
This is the fourth of a series of articles over the next 12 weeks that will cover my research and learning about the 2D animation program Cartoon Animator 5 created by Reallusion. I will share my learning journey including any problems or issues that occur. My end goal is to help you understand what you can do with Cartoon Animator 5 and perhaps try it out yourself. You can read the first week's article here.
A Quick Animated Scene (completed)
We started out with a character (Red_S) and added a short animation to her, then attached a cell phone as a prop. We'll pick up from that point and finish out the scene in a few steps. Note that it's actually taking longer to write this article than it does to create the scene.
- Step 4 Place the prop in the right layer
Our character, Red_S, has the phone attached to her left hand, but it needs to be moved a bit so that it looks like it is fitting into her hand. Also, we have to place the phone behind her hand. The first part is easy as we just click on the phone and make it slightly smaller. Then rotate it a bit so that fits into her hand.
As for placing the phone behind her hand, we do this in Composer mode/ Layer manager. Click Composer mode in the top left-hand corner, then select the layers tab in the lower right corner. You'll now see every element of the scene in a layer hierarchy. Click on the cell phone prop at the top and drag it done below Red_S's hand. Now the phone is behind her hand and looks much better.
Note that a prop becomes an accessory once you attach it to your character. Plus, you might have to continue to position the phone a bit to make it look right as Red_S brings the phone up to look at it. Just scrub the animation to get it right
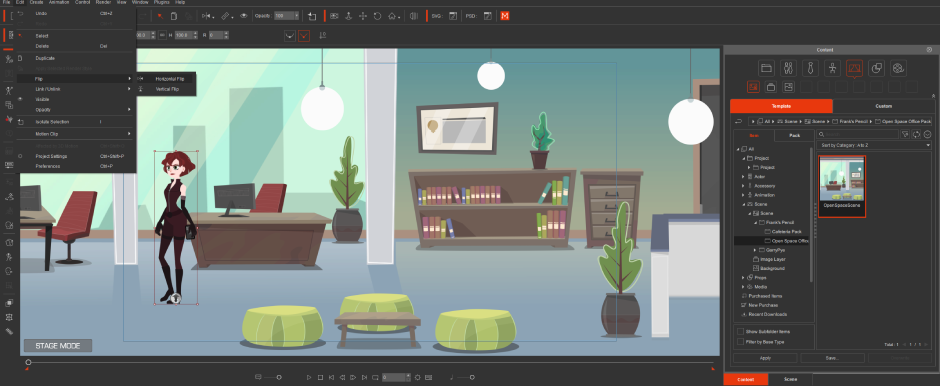
- Step 5 Add a Background Scene
Click back into Stage Mode (top left-hand corner). Now go to the contents tab on the right and look for the Scene contents. I'm using the OpenSpace Scene from Frank's Pencil (purchased in the Reallusion Marketplace store for cheap), but you can choose anything you like as the background for your scene. Since Red looks like an office worker, I chose an office scene. Use your imagination and put her in any environment you think works. Just click and drag it onto the main center stage area and the background/scene is automatically placed behind the actor.
You may have to position Red a bit so that she looks good. I moved her over just to the right of the pillar. But, I also want her to be facing to the right instead of to the left. Easy peasy - go to Edit/Flip/Horizontal and she is now facing to the right.
- Step 6 Add Another Actor She Can Talk To
Run the animation by clicking the timeline icon and the bottom of the scene. Should look good with Red chatting and pulling up her cell phone to check her messages. But we need someone for her to talk to. Let's add another actor.
I chose Kent_S2, another cool character I picked up on a sale at the Reallusion marketplace. He fits the kind of guy I think she would like. You get three positions for Kent: front, side, and profile. I'm using the profile so that he will give focus to Red. I also made him slightly larger than Red and placed Red in line with Kent so that they look like they are standing in the same place. I suppose you could have him walk into the scene, but she starts speaking right at the beginning of the scene, so it is better to have him there already.
But I will add a sit_idle animation so it looks like they are a bit bored with each other. Again, super easy to go to the search box under the animation tab and type "sit". You'll see the various sitting animations in real-time (I think this is an excellent way to help the creator work faster.


Comments