After some forth and back with TwoPynts I came up with a solution, that is based on the above tutorial, but adds some steps in order to provide more optical accuracy, by preventing items, that shouldn't be affected by the blur to get blurred.
The "How to" is pretty straight forward.
In addition to the steps in the tutorial create two additional layer. Leave one untouched - and apply the blur effect to the second, just in reverse.
Now follow through with the tutorial.
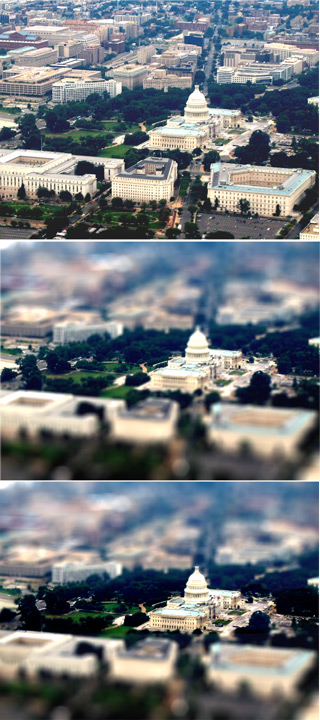
As you see in my examples 2nd image - the effect is already there - but it has the problem, that the top of the Capitol and some of the tree tops to the left and right of it are effected by the blur. To be optically accurate however - they shouldn't.
That where the copy of the original layer comes into play. Moved over the already blurred layer it will cover the entire image area.
Two ways to to handle the next step. Cutting out - or the use of the eraser. While the latter is faster - the former is more accurate.
Start to the left and work your way to the right and cut out the area that requires to be sharp and crisp. Once done, select "Inverse" in the selection menu and hit delete.
If cutlines are visible, use the blur tool, to smooth them out - and that should be it.
Now why the blurred inverse layer? Thats a tool for "just in case". If there are elements, that are unblurred but should be blurred - you can used that layer to achieve it - with the same steps as described in the previous layer.
Cheers
kjpweb
"Life is not measured by the breaths we take, but
by the moments, that take our breath away!"