
ladyperiwinkle opened this issue on Apr 07, 2009 · 12 posts
TrekkieGrrrl posted Sat, 11 April 2009 at 1:09 PM
Here's a short tutorial. I used my morphing vase because I had that in Poser already but the principle is the same of course :)
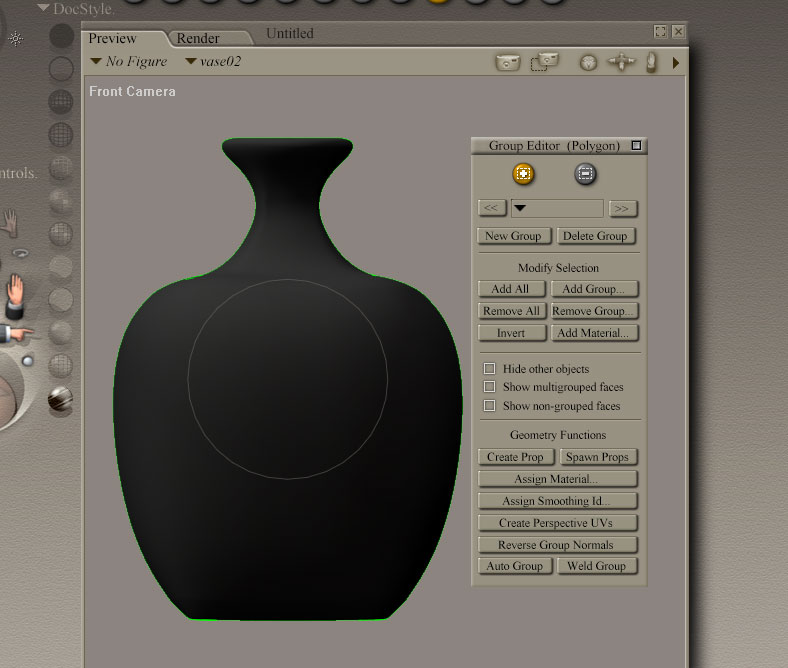
Open the Grouping Tool. Your prop or dress will turn black. This is normal. Use the front camera for ease of selecting both sides in one go
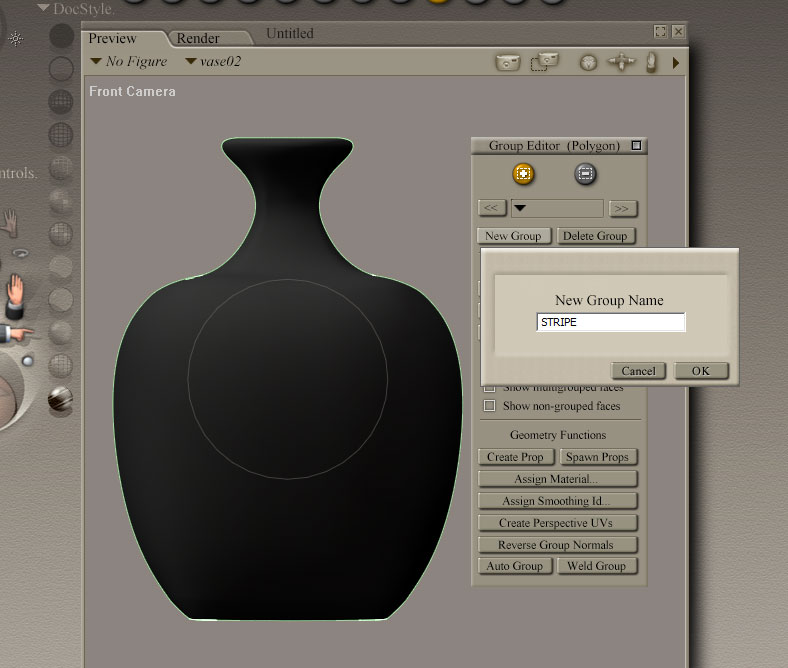
Click "New Group" and call it whatever appropriate. The name doesn't matter.
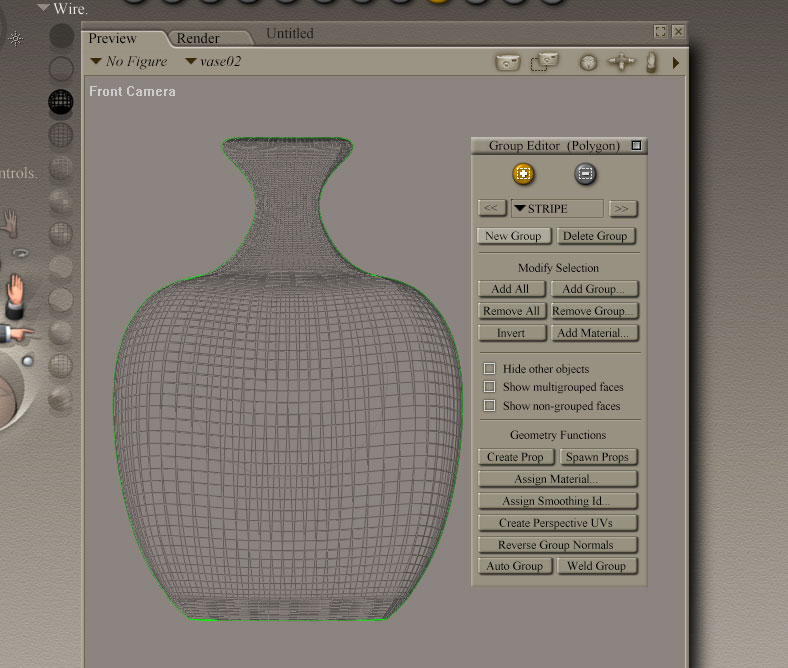
In order to select both front and back at the same time, go to WIRE mode preview. This is optional but I find it convenient.
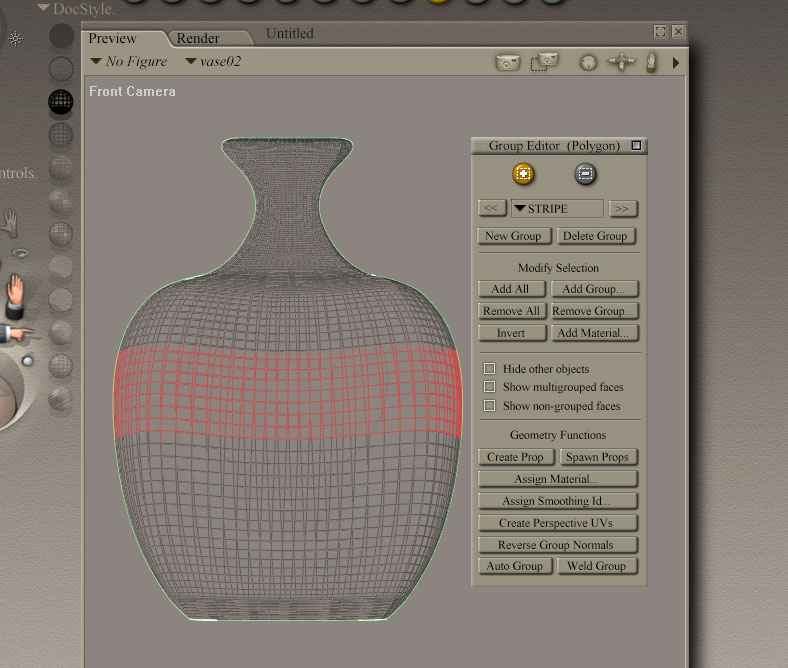
Select the polygons you want to have their own material by dragging the mouse over them. CTRL when hold deselects any stray polygons
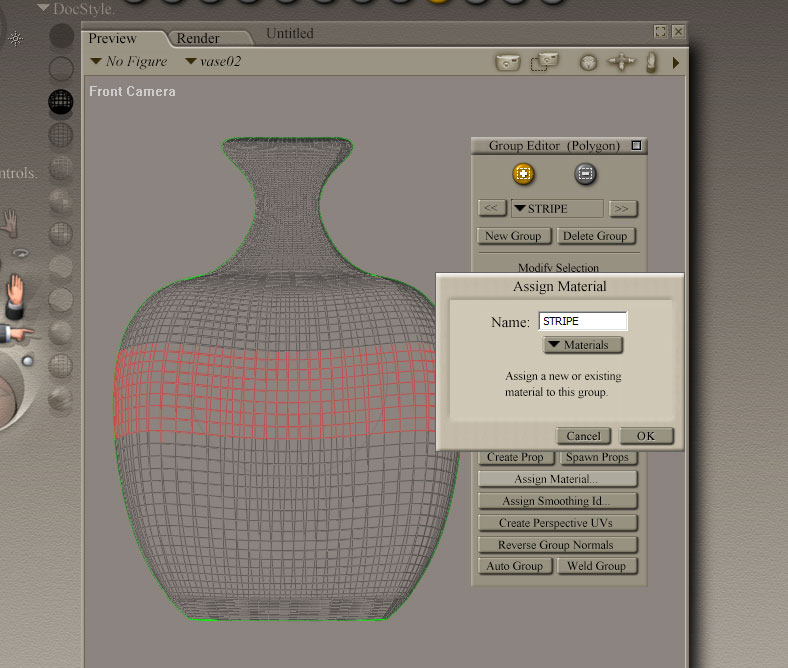
Click Assign Material and give your material a name (in this case I named it stripe just as my temporary group)
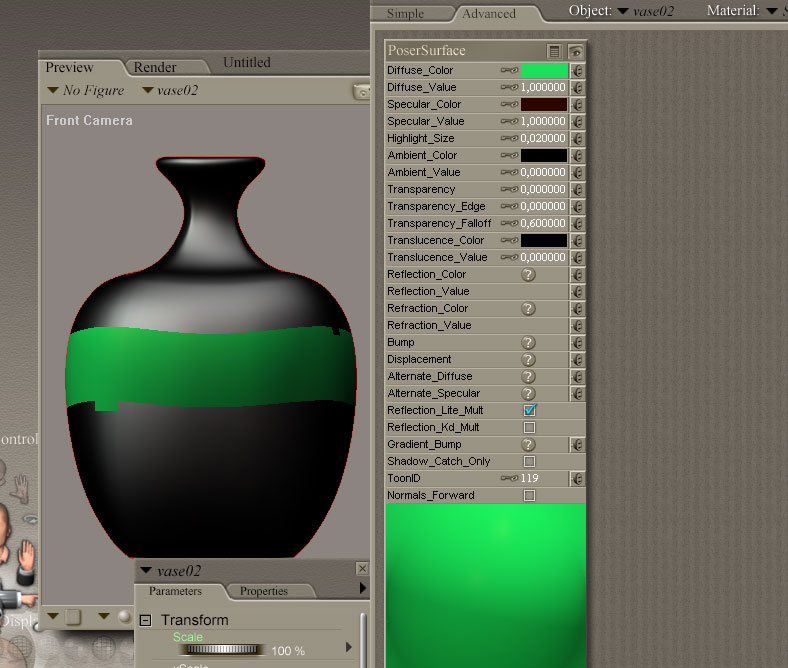
In the Material Room you will now have a new material on your dress or prop or whatever. Assign an appropriate material to it. As you can see I wasn't taking enough care when selecting the polys because this was just a quick thing for this tutorial.
And that's it. This is how the Grouping Tool works :) Very easy.
FREEBIES! | My Gallery | My Store | My FB | Tumblr |
You just can't put the words "Poserites" and "happy" in the same sentence - didn't you know that? LaurieA
Using Poser since 2002. Currently at Version 11.1 - Win 10.