xxancroft opened this issue on May 17, 2004 · 8 posts
xxancroft posted Mon, 17 May 2004 at 3:54 AM

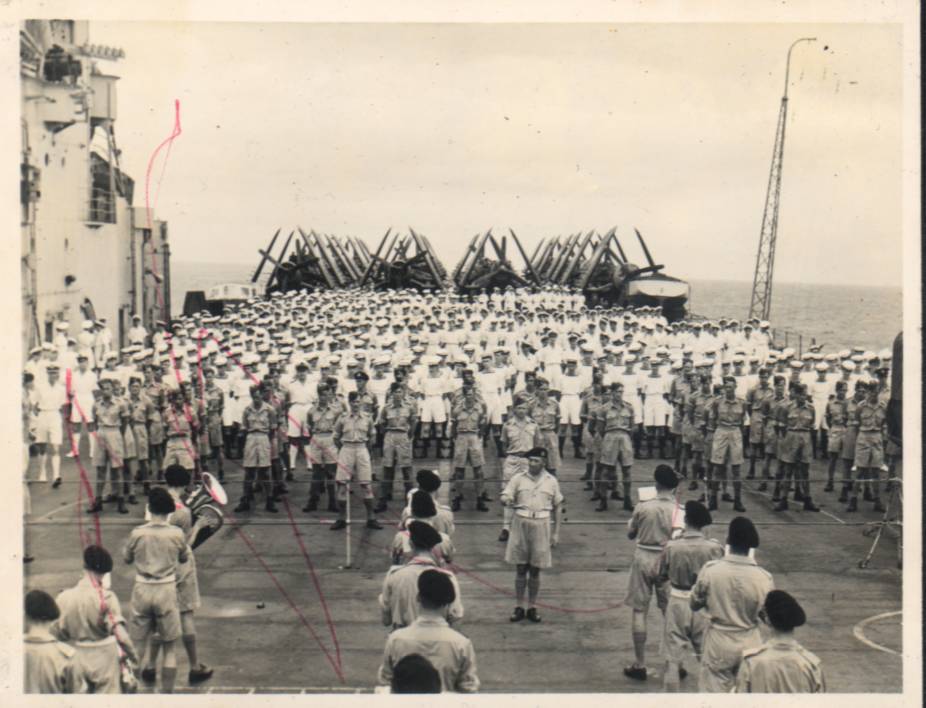
At the moment I am going through old family photos and digitally enhancing them.
Some of them have suffered at the hands of an enthusiastic baby with a red pen. (It is entirely possible that this was me in a former life)!!
Does anybody have a method or link to a tutorial for removing the red pen but not the underlying image?
Hoofdcommissaris posted Mon, 17 May 2004 at 5:41 AM
You can use the clone tool and set the blend mode to color, next to the brush thumbnail in the upper bar. You will probably still see some greystripes, but the parts that go unnoticed after removing the color keep you from doing too much stamping. Try the healing brush for the parts of the remaining lines that go over the ground. I suppose the parts that are still visible on the soldiers and such need zoomed in cloning tool work, with a small brush size, a relatively low opacitiy and a lot of option-clicking to use different parts as a source (a Wacom pen is nice to have around for subtly 'painting' away stuff, because you can handle the opacity by pressure) to prevent repeating paterns and visible repairs. Good luck! BTW I hope you have a much larger file to work on then this jpg, size matters, in this case.
dreamer101 posted Mon, 17 May 2004 at 2:27 PM

xxancroft posted Mon, 17 May 2004 at 7:38 PM
Thanks for your comments dreamer101 and hoofdcommisaris. The original photo is no bigger than 3"x 5" Is it better to work on bitmap or a jpeg? Dreamer101 where do i find the tinker button on photoshop?? What did you do to the image? Thanxx again!
dreamer101 posted Mon, 17 May 2004 at 8:47 PM
You should scan your photo at resolution of 300 or more. The higher the better. GIF and JPG are compressed (lossy) files and should only be used as final product if it's for the web.
Since I only had a jpg to work with, the final results aren't very good.
There are many ways to achieve a quality restore and some are quite involved. This was the easiest to explain.
BTW the tinker key is next to the any key ;)
Ornlu posted Mon, 17 May 2004 at 10:57 PM

Ornlu posted Mon, 17 May 2004 at 10:58 PM
Granted I didn't do a great job and the original jpeg quality wasn't the best to work with... And i made some blatantly obvious mistakes in portions, but that's pretty much the best way to do it. By hand. This way you retain the original colors of the image.
xxancroft posted Wed, 19 May 2004 at 7:43 PM
Dreamer101 and Ornlu Thankyou for your comments. They are nmost helpful. I will try out your suggestions, on this and some other red lined photos. Incidentally the pic is an onboard view of troops on Parade on a Sunday, steaming from Auckland NZ toward Japan on HMS Glory at the end of WW2.