Wampyir opened this issue on May 29, 2004 · 8 posts
Wampyir posted Sat, 29 May 2004 at 5:33 PM

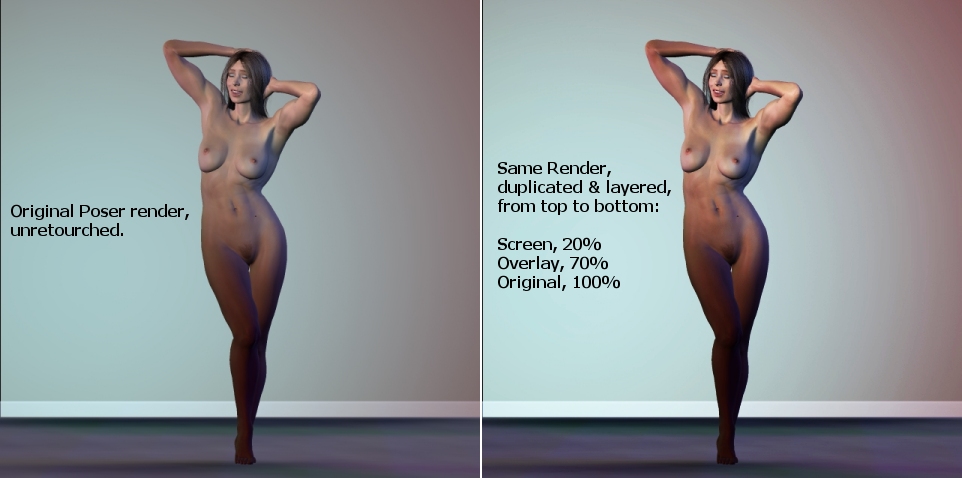
On the left is the original Poser render, unretouched. On the right is the same render, with the image duplicated twice over the original (i.e., the background layer) and blended as follows:
Top layer: Screen mode, 20% opacity
Middle layer: Overlay mode, 70% opacity
Bottom layer: Background (default), Normal mode, 100% opacity
I'm sure the effect these blend modes have will vary greatly from image to image, and I'm sure these percentages won't hold true in every case. But if you're wondering how to make your renders look a little more photorealistic, here's a good place to start (the Multiply blend mode is also very useful).
Comments and suggestions more than welcome.
maxxxmodelz posted Sat, 29 May 2004 at 5:46 PM
Nice job. And in Photoshop, playing with the Levels sliders can achieve the same or similiar effect.
Tools : 3dsmax 2015, Daz Studio 4.6, PoserPro 2012, Blender
v2.74
System: Pentium QuadCore i7, under Win 8, GeForce GTX 780 / 2GB
GPU.
MistDragon posted Sat, 29 May 2004 at 8:01 PM
Thanks for the tip, I'm going to give this a try in my next render :D
MISTDRAGON
SamTherapy posted Sat, 29 May 2004 at 8:27 PM
Yup, Photoshop/PSP can do wonders. So can playing with the lights in Poser. Now, in case you think I'm ragging on Wampyr, I ain't, nor am I dissing postwork, since I do use it from time to time. But... Lighting in Poser ain't exactly rocket science. You can get some awesome effects if you're prepared to take the time to experiment. I honestly prefer doing the whole bag of mashings in Poser if possible. Not to be a purist, but to have a sense of "right here, right now" which you will never achieve with postwork.
Coppula eam se non posit acceptera jocularum.
stephaniebt posted Sun, 30 May 2004 at 9:21 AM
In PhotoImpact, as well, you can run the Sunlight filter on images rendered with global lighting and warm up the skin tones considerably.
macmullin posted Sun, 30 May 2004 at 11:49 AM

One filter that seems to get used allot but never really used properly is the emboss filter feature. Their result on any image in my mind is used best as giving any plain object three dimensional qualities. Using it as blending overlays on top of other texture element(s) or can be used as a base layer for other textural elements that are blended on top of in the form of an overlay(s).
The Celtic boarder is a black and white vector graphic created in Illustrator(above in the diagram) was imported into Photoshop, blured very little and then a emboss filter was applied (Angle = -90, Height = 2 pixels, Amount =130). Then other texture elements were overlaid with different blending modes such as Multiply and Overlay with different percentages of transpierces. You can eventually see the carved wooden panel emerge from a simple black and white graphic.
I hope this will help some one in future, with their texturing endeavors.
Message edited on: 05/30/2004 11:51
SoonerTW posted Sun, 30 May 2004 at 5:14 PM
Anyone care to write up a little tips and tricks tutorial about this. I for one would love to hear some of the tricks...
macmullin posted Sun, 30 May 2004 at 6:41 PM
You can by whole books on this subject. The Photoshop Wow Book is one that comes to mind. Moreover, you already can find countless tutorials all over the inter net. Just do a search and you should find something to serve your needs.