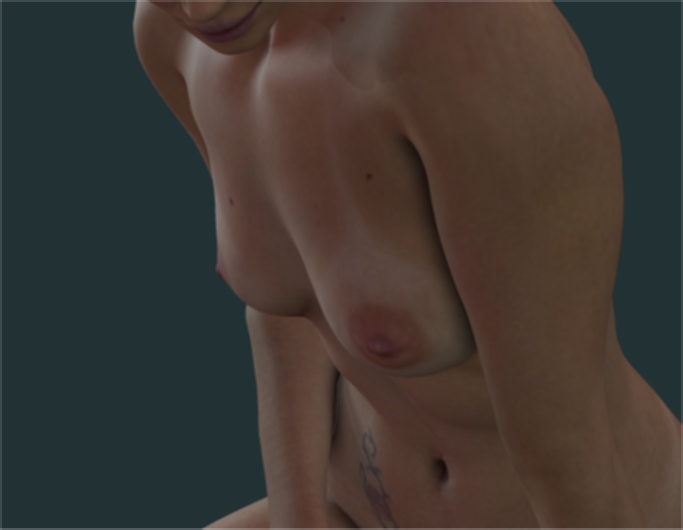
The following is not necessarily the opinion of fellow renderers, merchants or other cgi gurus. But if you hate to wait... LIGHTS... I've been quickening the effect (impatient and ailing pc) by using an infinite light (RayTrace shadow set to .30 to .50) with blur (avg 2- 10. Bias is .80 to 1.0)...as the main light. I suppliment this with a specular only infinite light(RayT) with shadows on (20-45 intensity). Keep the spec light on top of your mainlight or close to it. The main fill light is an IBL(anywhere) tinted to fit your scene. Light intensity set from 45 inside to 90 outside. Shadows off! Specular black. Now if you are really lazy,,,turn AO ON the IBL and reset AO scene options to 1.0 max distance, 0.04(inches) bias or thereabout. Rendetimes are about 1/8th of the time of an equivilent shadowmap spot system. There are artifacts from the AO/IBL light but, not bad. SHADERS... All this has to be used with Real Skin Shader(fastest) or one of the others(better quality)...A must. Period. No (fake...lol)sss or correct specular on skin, no realism. Yes,,, you can put a high res skin on and not use shaders but it will fail when you move it or animate. These skin shaders also can add freckles or skin mottling to augment, say,, a low res skin...faster still in a render. AO... Now,,,if you really want a nice render, Use AOmaster after running the skin shader. Set it ON for all surfaces UNDER another...(hand on hip, AO OFF on hand and fingernails, ON on hip, torso, etc). AOmaster adds a specular node to the mix...a nice benefit. Easy to use. Don't put AO on hair...put it on the head, neck, torso and turn hair shadows off (parameter box), Visible in RayT OFF instead. Big time saver. HAIR... BIG time killer. Be honest,,, if you have a full figure visible in a 1024x768 window, do you need a 2000x1000 hair texture stuffed into that 100x200 area? Or, do you really want to drop the shading rate to get rid of the artifacting(firefly flippin out on the big texture)? Go to your paint prog and resize these textures and transmaps to 50% and save them as such(Koz red 1half.jpg,,Short TR 1half.jpg) Load them in the matroom and back in poseroom save them to hair library with a new name...You'll love it. Thanks stewer! SKIN... Hard to improve on the Skin Shaders but, the settings can be played with. Bump to 0.03, and/or displacement to 0.035(and in matroom change granite scale to 12 from 5) om bodyparts(opens up the creasing and can be made to even resemble cellulite)... Add tint to the torso color (taupe purple/blue on top Right of color zone), then save it to matroom library and click it onto each bodypart...If you are really adventurous, you can open up the shader and change the colorramp there. Keep specular low. Instead add an anistropic node to Specular color (white) and set value to 0.20. Play with highlight size,,,Set anistropic node to an aysmmetrical value(0.01x0.5, ex)...same for fingernails. Impatient,,,right? You can turn off bump and just use displacement if far enough away... Skins can be resized also... EYES... Don't use reflection/refraction nodes unless the face fills the screen. Don't use specular color either (make it black). Cornea and eyewhite are you're only reflective surfaces so, add an anistropic node to them. Scale the node to taste. Bump the eyewhite from texture.(pull a wire from texture to bump and set it to say, 0.008). This breaks up the anistropic at a low cost. For cornea, same with anistropic but add a transmap reflect texture instead. Make sure it's on the side of the mainlight! If not, mirror them in paint and reload them in matroom. Iris and pupil need only the texture. If using AO, attach to eyewhite( 0.5 to 1.0) Closeups are another matter... CLOTHING... What's that? Check the texture sizes. Make invisible all body parts hidden under cloth. Hell,,, make invisible ANY part not visible in your scene... In hierachy editor, a quick off/on on universe restores everything. Just in case,,,HIP controls body. ALT/left mouse on HIP makes all body invisible. Left click, head, eyes, neck, prop hair to make visible etc for full clothing. Gloves,,, ALT/left click forearm and all below shoulder is invisible. Repeat to make visible. ALT/left click Buttock and all below are gone....(unless bloody GOAL got in the way) RENDERSETTINGS... Less than you may think. I rarely render over 1024 max texture res. I never go higher than 2048. Shading rate at 2.00. No filters. No smoothing unless it's close... RayTrace bounces at 0.00-1.00 unless there are mirrors or a closeup. Pixal samples at 3 RayTrace ON Shadows ON Use displacement maps ON Hope this aleves some pain
