Renderosity Forums / Photoshop
Welcome to the Photoshop Forum
Forum Moderators: Wolfenshire Forum Coordinators: Anim8dtoon
Photoshop F.A.Q (Last Updated: 2025 Jan 14 1:57 am)
Our mission is to provide an open community and unique environment where anyone interested in learning more about Adobe Photoshop can share their experience and knowledge, post their work for review and critique by their peers, and learn new techniques while developing the skills that allow each individual to realize their own unique artistic vision. We do not limit this forum to any style of work, and we strongly encourage people of all levels and interests to participate.
Sharpen your Photoshop skill with this monthly challenge...
Checkout the Renderosity MarketPlace - Your source for digital art content!
Subject: Help/Suggestion about painting shadows in my current project

Roughly mask of the section of shoulder that needs the shadow. I used the polygonal lass tool.
Put this selection on a new layer (Ctrl+J).
Lock the transparent pixels on this new layer.
Using the gradient tool choose the colour stop colours of the blend you need. These would be the shadow colour eyedropped from a shadow area of your picture and the skin tone you want it to blend wtih.
Apply the gradient to the selection.
Change the blending mode of this layer to darken.
With a soft eraser brush remove any excess parts of the selection.
Repaint any hair that was covered up by the blend.
Hope this was helpful.
My Renderosity Store
Virtual Furnishing
My Portfolio
try level shadows
on a new layers, also try to copy a part of your drawing on this new layer, and flip verticaly also try to distort or modify respecting the colors darking , lighting or also angle of the light on you drwaing it appears to come from the back so your shadow will come form the back to the front around the leg or arm.
i think also this way because i am a oil painter so you need to look at the parts and klip move turn or distort and respect the colors but make them darker or lighter depends of light effect.
regards Oneric
t hanks those are good tips i will have to try those. I did do it my way as well using a paint brush at 40% opacity and sampling different parts of her skin with the color picker then painting them in on a new layer then guassion blurred it and came with some good results
But going to try kepple technique that is a pretty good result you got :)

Here I created a Levels Adjustment Layer and clipped the whites down, then brought up the mid-tones and blacks, inverted the mask (Ctrl+i) so it was hidden, and with a pantbrush, using white, I painted in the "darkness". I overpainted a bit - this is normal, - then used Black to hide the overpainted areas (I painted black to hide them again - I dunno how much you know about Masks in PS).
The major highlighted areas on her skin were still a problem, so I made ANOTHER Levels Adjustment Layer and clipped the whites, brought up the darks again, etc., then used a soft edged brush and painted those areas to bring them down further.
Any additional coloring here, I would probably do some actual painting at a low opacity, but this will give you a good start to how things might look or react to the actual lighting conditions in the render.
Hope this helps, and good luck-
-Lew
Privacy Notice
This site uses cookies to deliver the best experience. Our own cookies make user accounts and other features possible. Third-party cookies are used to display relevant ads and to analyze how Renderosity is used. By using our site, you acknowledge that you have read and understood our Terms of Service, including our Cookie Policy and our Privacy Policy.


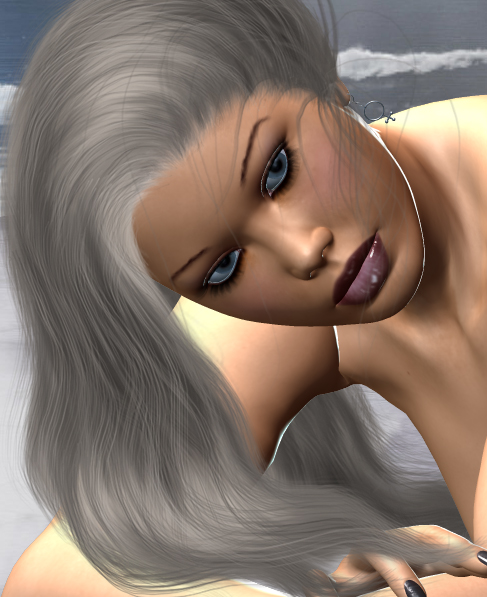
Here is the image I am working on in postwork as you can see under her hair and on her shoulder the light is too much where it should be shadowed. Now I could just go back and rerender the whole thing adjusting the lights and waiting hours again to render or my other ideas is to paint shadows where they should be.Normal I add shadows to the skin when I paint cloths using a soft brush 40% opacity painting the shadows on a new layer over the cloths then moving it down below it then gaussion blur it but not sure that would work I tried it and it looked to fake and horrible.
So now i am here asking if anyone else has any ideas I can try to get a good shadow effect between her shoulder and hair.