Renderosity Forums / Photoshop
Welcome to the Photoshop Forum
Forum Moderators: Wolfenshire Forum Coordinators: Anim8dtoon
Photoshop F.A.Q (Last Updated: 2024 Nov 26 6:58 am)
Our mission is to provide an open community and unique environment where anyone interested in learning more about Adobe Photoshop can share their experience and knowledge, post their work for review and critique by their peers, and learn new techniques while developing the skills that allow each individual to realize their own unique artistic vision. We do not limit this forum to any style of work, and we strongly encourage people of all levels and interests to participate.
Sharpen your Photoshop skill with this monthly challenge...
Checkout the Renderosity MarketPlace - Your source for digital art content!
Subject: How to do this?
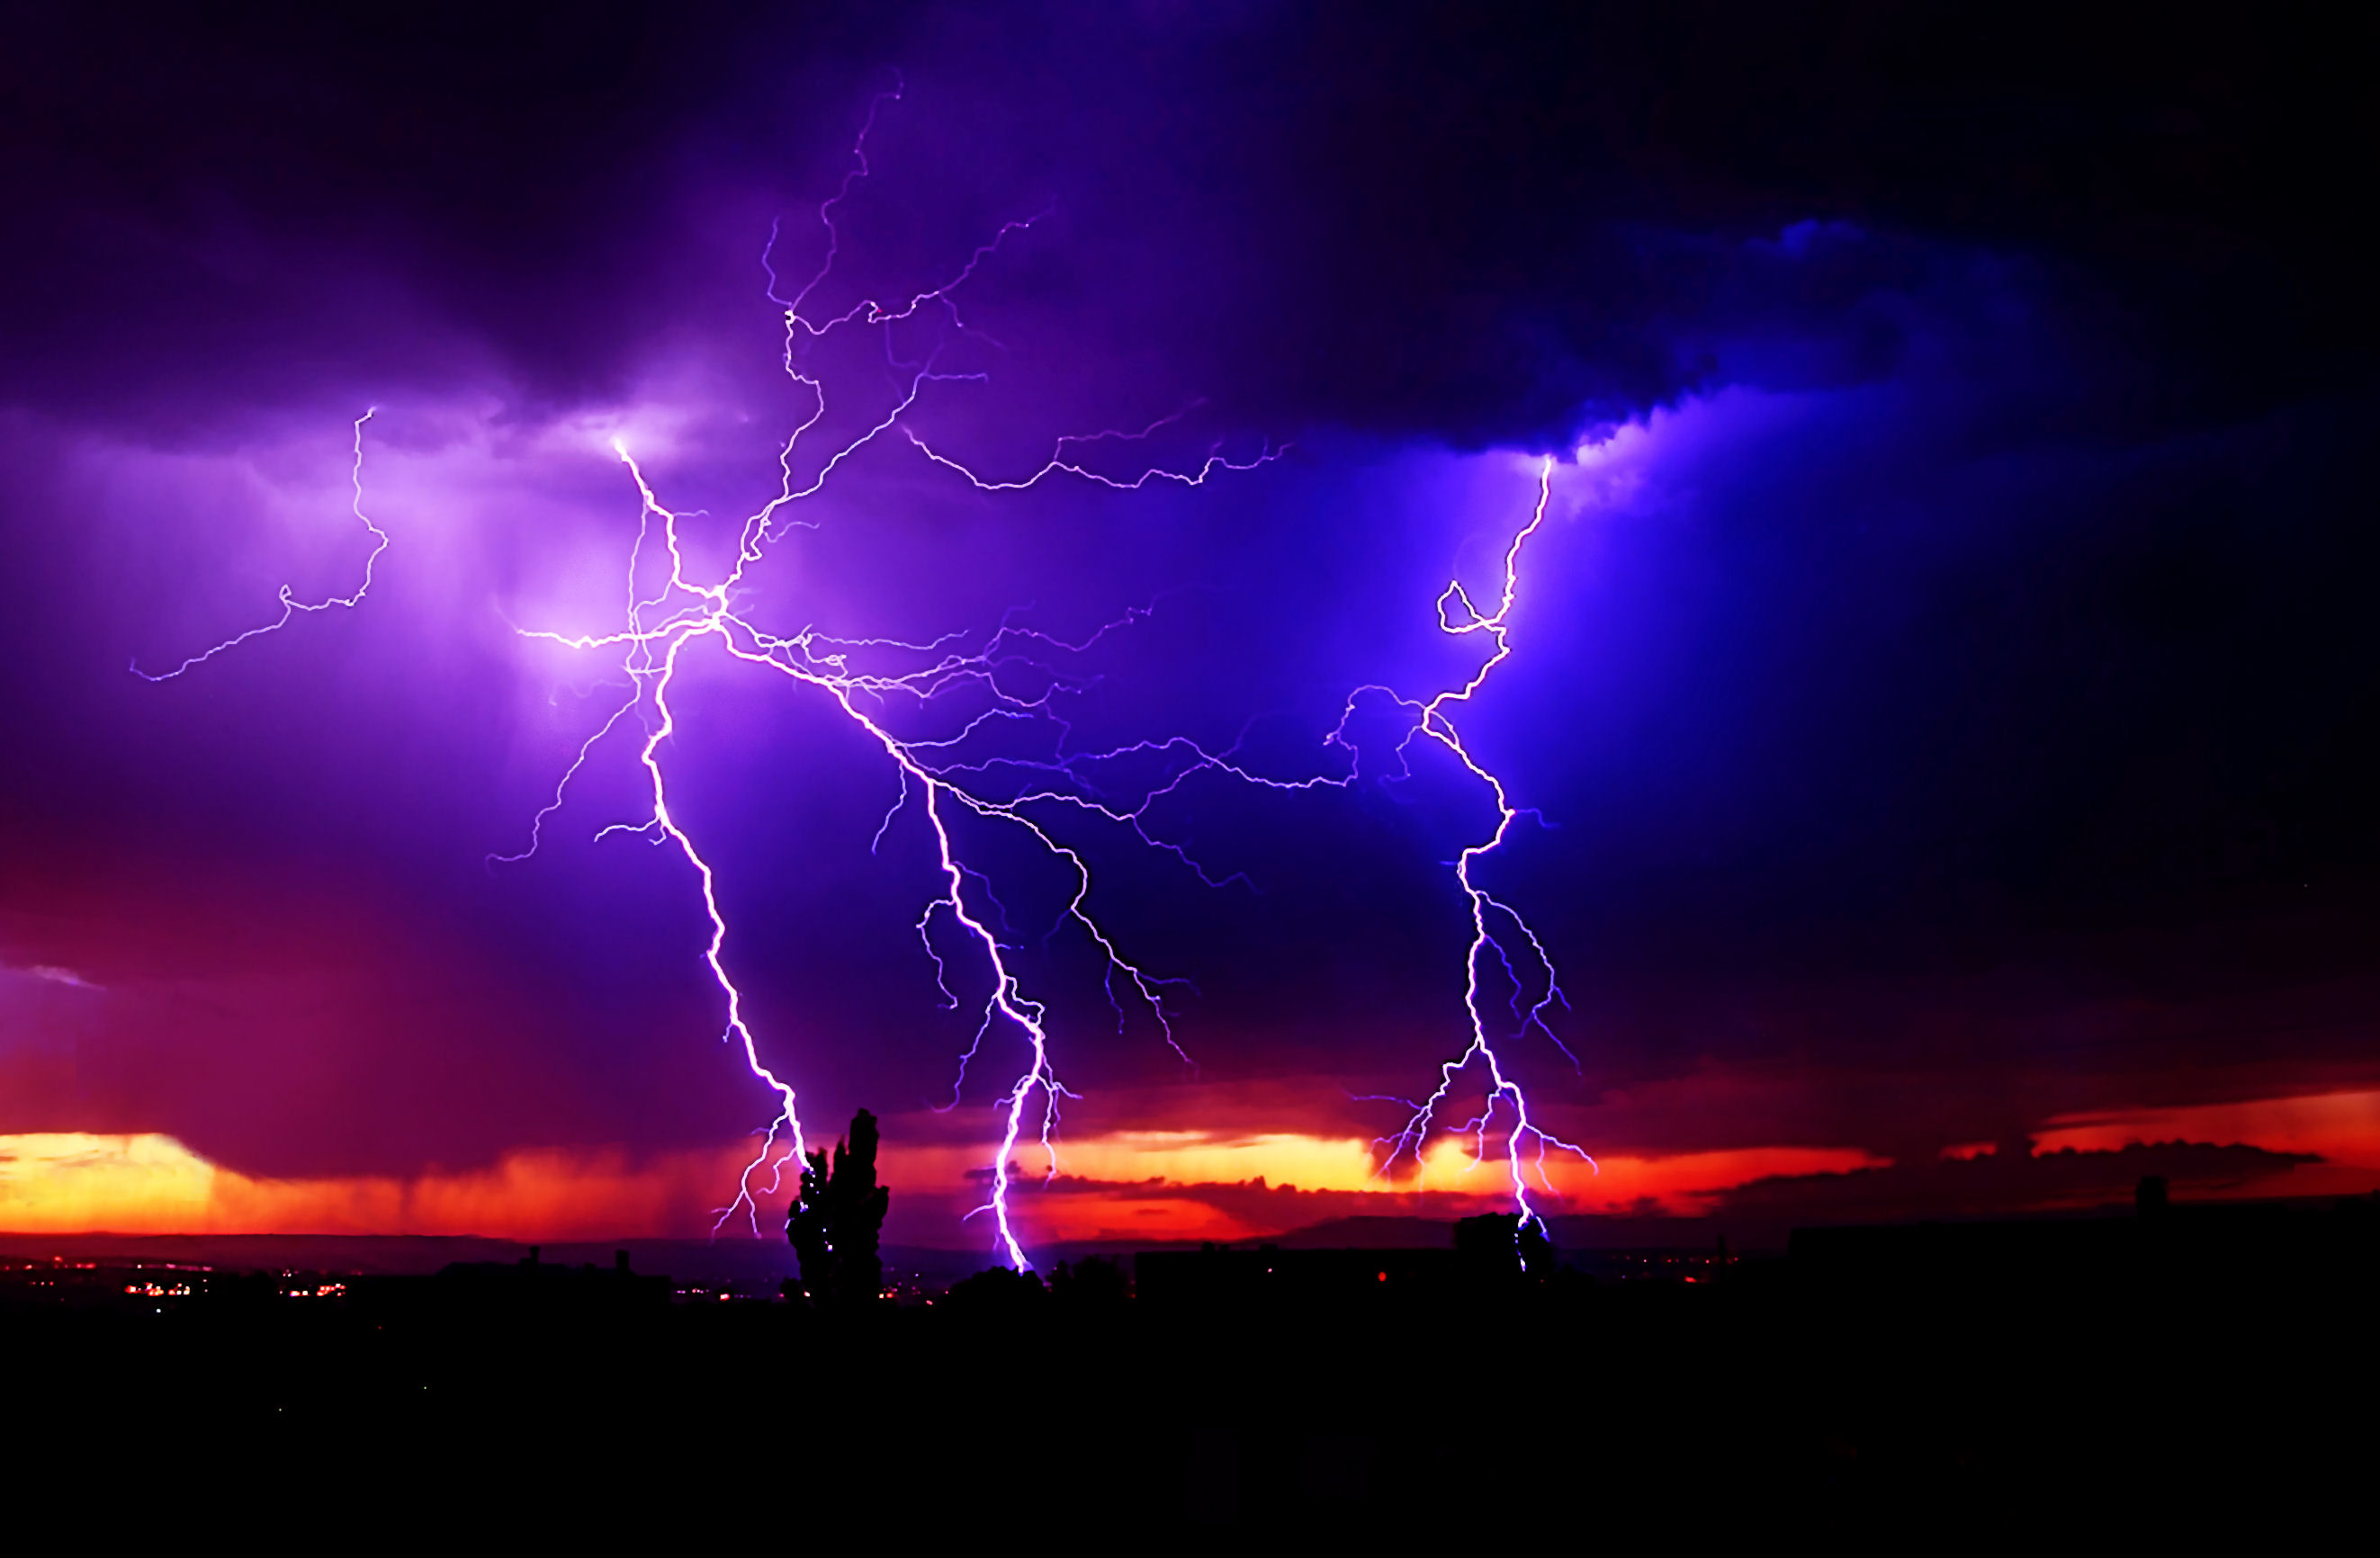
one way toi get the different color effects would be to create several duplicate layers, adjust the color of each layer, then erase parts of each layer to get the desired results....in the ocean scene, looks like they used the smudge tool on the water
here's some great tuts :
Dreamy, Magical and Lighting Effects Photoshop Tutorials
http://www.psdbox.com/category/tutorials/manipulations/
http://photoshopcafe.com/tutorials.htm
http://www.photoshopstar.com/category/photo-effects/
http://bestphotoshoptutorials.net/
the bottom one is done with the camera.. the exposure and the light as well as the focus affects it. try the photography forum on that one..they'll be able to help you. you can blur/smug the water..if you want to.. as well as 'darked/ bright'certain areas using the dodge tool. as well as the overall adjustments of the pix.
you can also use the brushes..to 'paint' in the colours you want.. or use difference clouds in the filter section on a different layer.. erase the parts you don't want..and clur/opacitate it tosuit your requirements.
as for the top..real shot..again..exposure, and shutter speed..and the camera used. You may want to try alien skin software.. and flaming pear. flaming pear has lightining. both of them have excellent filters and software you can use. also..with an actual shot..right time, place and speed..and way loads of shoots.
you can make your own lighting too..http://tutorialblog.org/lightning/ ought to help.
cheers
For the sake of argument, let's say the first picture was just monochrome - the whole thing just had a pale blue tint.
If I was going to colorize it to that level, I would create an Adjustment Layer (down in your Layers Palette). I'm a big fan of the Levels Adjustment Layer, but this could be done with any nuimber of them - Curves, Hue/Saturation to name a couple.
Make the Layer, make adjustments to taste, invert the mask (the white box to the right of the thumbnail - hit Ctr/Cmd+i to invert it to Black which will hide the layer), then with a BIG SOFT brush, paint white where you want the change of color. Adain, for the sake of argument, that was the purple coloring.
Do it AGAIN, but adjust the color to a rich Blue - invert, paint white where you want the color to change.
Any other colors, rinse, repeat.
I hope this helps - happy Photoshopping!
-Lew
I don't believe the ocean scene was done with the smudge tool, it's done with the camera, just a long exposure. Not sure filters were used on those photos actually other then maybe increasing the saturation, they're just good photos I think.
Lucie
finfond.net
finfond.net
(store)
In a sense, this is OT but, one thing you will learn as you go... Nothing in Photoshop is truly single-purpose.. in fact, very little is. Filters, masks, gradients, effects.. those found uses for someone, originally, for something they needed to do.. then others discovered that they could be used for OTHER things, as well.
Colour lens filtres are a good example... they are used in photography to enhance or reduce colours... reduce the red, with a filter.. and you get a scene that will generate a sense of bleakness. Good example.. in "Joe Vs the Volcano".. the first scenes were filmed with heavy filtering to generate a sense of depression and near despair. Today, we call them other things, but the effects remain the same.. but, with digital, it's controllable virtually down to the pixel.
My point is.. don't let the names fool you into straight-line thinking, nor the examples given... those are just a rough idea of what it can do. I think everyone here will agree... experimenting with the tools is one of the best things you can do.. an attitude of "What ELSE can I do with this?" is always a good one.
Aside, here, one of my favourite tricks, when erasing large areas... temporarily apply "stroke", in style, to find those annoying stray bits that get missed. Lou.
"..... and that was when things got interestiing."
A gradient layer or two with masking and fidgeting around with blend mode settings might be one way to get multicolor lightning. Some of the other stuff looks a little complicated though.
Your friendly neighborhood Wings3D nut.
Also feel free to browse my freebies at ShareCG.
There might be something worth downloading.
Privacy Notice
This site uses cookies to deliver the best experience. Our own cookies make user accounts and other features possible. Third-party cookies are used to display relevant ads and to analyze how Renderosity is used. By using our site, you acknowledge that you have read and understood our Terms of Service, including our Cookie Policy and our Privacy Policy.


Last couple of years I see Pictures/Photo's(never understood the difference) pop up on the net as if they have been undergone some filtering or something, I can't realy explain it but let me say it so that every part of the pic has another color filter or something and they look realy cool, I was wondering if anybody knows how to do that?I've attached a file as an example so maybe you'll understand what I'm saying.
b.t.w. I'm a begginer, so don't laugh hard if you find this post funny or something!!! I will be watching you!
thanks in advance