-
Marketplace
-
Free Stuff
-
Galleries
-
Community
Forums General
- News
- Deals
- Poser
- Contact
Sun, Feb 2, 10:03 AM CST
Renderosity Forums / Vue
Welcome to the Vue Forum
Forum Moderators: wheatpenny, TheBryster
Vue F.A.Q (Last Updated: 2025 Jan 30 6:52 am)

Subject: How to Conserve Resources Populating an Ecosystem

Report Post
-
- Renderosity Page
- Renderosity Communities
- Blender 3D
- iClone
- Poser Users
- Poser Software
- Become an Affiliate
- Memorials
-
About
- About Us
- Contact Us
- Team
- Policies
- Terms of Service
- Copyright Policy
- Refund Policy
- Licenses
- Standard License
- Extended License
Privacy Notice
This site uses cookies to deliver the best experience. Our own cookies make user accounts and other features possible. Third-party cookies are used to display relevant ads and to analyze how Renderosity is used. By using our site, you acknowledge that you have read and understood our Terms of Service, including our Cookie Policy and our Privacy Policy.
This Tip is for those who do not have Vue Infinite or xStream and cannot paint on the ecosystem.Although it may be helpful to some Infinite users for the most part this tip helps those who have Vue Pro Studio, Vue Esprit, and Vue Easel and have or do not have the Ecosystem Module.
This Tip can also be used for Scatter and Replicate when you want to save resources while using a large Standard Terrain or a Procedural Terrain. Additionally, this Tip does not rely on the need to create Maps that may alter the distribution or placement of objects in a specific pattern on the Terrain, although you can still use them if necessary.
When you try to populate a large procedural terrain it may take billions of polygons that use all available memory and bring your system to a halt. Ordinarily, this can be avoided, since most scenes are close up and do not require a view of the whole terrain. With this in mind we can use a technique that reduces the area of view so that the ecosystem can be populated with minimal resources. That can also mean that with existing resources at a minimum, we may be able to add more plants, object, and rocks in your new scene, giving it more interest.
The process is basic and creates a group of objects that can be used on a terrain and once saved as a single object used again on terrains constructed at a later date.
Note: I like to use very large procedural terrains because they have such great depth and detail and will follow that trend in this demonstration. I have added water to minimize the land surface area for ecosystem placement.
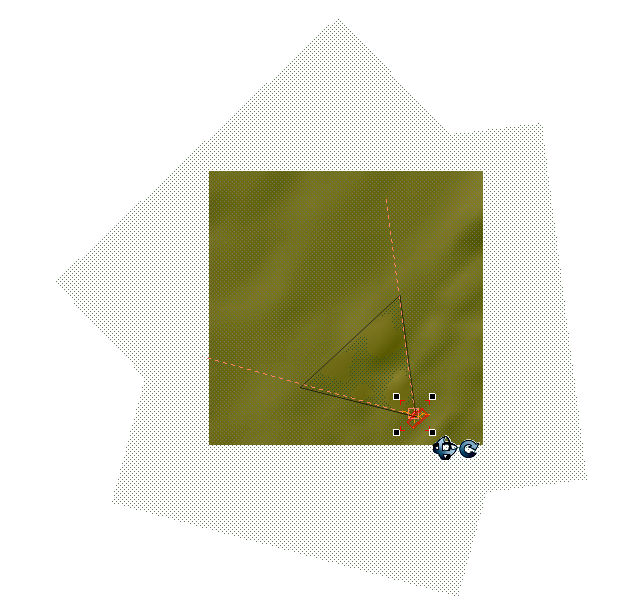
I will move the camera around until I find an area that has a little interest. Before we add the ecosystem we want to select the area we will populate. In this case that will be a triangular area parallel to and perpendicular with the Main Camera.
Toggle to all Four Views and center the landscape in each view. Then select the Top Orthogonal View. Add a Cube and stretch it to a rectangle half the length in width and as long as the terrain with a thickness that is slightly taller than the highest part of the terrain and larger than the deepest part of the terrain.
Change the material of the new Rectangle to the following: Select the texture Water. Turn OFF or uncheck all of the Effects and leave the Mapping at World - Standard. The Alpha color should be pure white. Zero or No Bump. NO Highlights, other settings at Zero. Transparency set to 100%, Refractive Index at 1.0, all other settings at Zero and any others unchecked. For Reflections, Translucency, and Effects set all settings at Zero and all others unchecked.
We now have a colorless and fully transparent block that can be used to cover our terrain on one of three sides. Duplicate this Rectangle and create two more blocks so that there are three in all. Move one of the transparent block parallel with the left side of the Main camera, then the right side of the Camera, and finally perpendicular to the Camera, then across the ends of the other two transparent blocks. You may have to stretch this last block to cover all of the remaining terrain. See the image provided. The black bordered area is the area the three blocks do not cover and are for ecosystem population.
After you have placed the blocks and aligned them to cover the terrain 3 dimensionally then group the three Rectangles and save them as a group so that you can reuse them in later terrain construction.
Now you need only make minor adjustment and add your ecosystem and populate. If you want to change the camera angle then select the Camera and Group of Blocks so they will all move as one.
If there is light or shadow reflected from any block after Rendering, hit the Cursor down key to make them fall below the terrain and reRender the scene. Later hit the Cursor up key and they will pop back into place, if nothing else has since moved.
jankeen.com