Renderosity Forums / Poser - OFFICIAL
Welcome to the Poser - OFFICIAL Forum
Forum Coordinators: RedPhantom
Poser - OFFICIAL F.A.Q (Last Updated: 2025 Feb 01 9:10 pm)

Subject: Need a little help with shadowing

If you have three different lights, and they all have shadows turned on, you'll have three different shadows because the lights are in different places in the scene ;).
Since you used two lights, the infinite is going to shadow everything in the scene. The shadow on the wall is your spotlight. The two on the ground are the shadow from the plane and the figure. I don't see anything that's not supposed to be there.
IDL will lighten shadows in areas where the direction of two different lights intersect. This happens in real life as well. It also depends on the relative strengths of the two lights, their direction, and how close they are to the objects.
Laurie

Quote - I've been told it's good to have that shadow on the ground in the front of the character as well.
The shadows should balance between what you want the picture to artistically show and realistically incorporating the shadowing object into the scene. Anyone who tells you there's a hard and fast rule like having the shadow on the ground in front of the character is full of it.
Now look at the part of the shadow where the red arrows are pointing. The other light seems to lighten part of that shadow in that particular area. Is this a bad thing, and if it is a problem, how would i fix this?
No this is not a problem as the light from the other source is adding light to the main light. This is expected.

I got another question.
I like using gamma correction in poser. I use the default of 2.20, and i either apply the script correctgamma or use scenefixer to apply 1.0 gamma to the necessary maps, like bump, transparency, etc. When i use ezskin2 on a model, i don't have this problem. However, on certain models where i don't use ezskin2 and this also happens within the scene itself, gamma correction sometimes gives it a dull, washed out appearance, which pretty much forces me to either switch to non-gc if it's terribly bad, or apply fixes in photoshop. The uploaded image shows exactly what i mean.
Now i understand that it depend on the materials of certain characters, and certain characters aren't designed for GC, or linear as many have put it in here =P But this also occurs in the scenes itself. Is there ways i can avoid that dull, washed out look when using GC?

The lighting is one factor as LaurieA pointed out. However, the material settings should also be adjusted on other props and objects. This is all correctable with Scenefixer.
For example, most surfaces will not reflect diffuse lighting 100%, some of it is absorbed while reflecting something back into the environment. Of course there are exceptions to the rule. As a starter, Scenefixer defaults the diffuse_value to 85%. A reasonable value to use. However, if you are setting up your scene in a darkened environment, that value should be lower.
Grayed color chips, for the most part, are cheats to bring down the brightness value of the image map. Not very acceptable where Poser Pro is concerned.
Yeah, i noticed that with GC on, the lights have to be turned down quite a bit. But that grayish dull look sometimes persists and highlight definition on skins also sometimes move too much to one color, making it look very flat. I usually can correct this in photoshop with a softening technique, which brings all the interest back to the picture, but i wonder if maybe i'm overlooking something that i may be doing wrong. I'll look more into scenefixer, as i've been using it to set the values of my bump/specular/transparent maps back to 1, but even then, the dull, grayish look persists. It's a hard choice because there's things i like in GC, and things i like in non GC, and i may not always want to use ezskin2 on a particular figure.
Privacy Notice
This site uses cookies to deliver the best experience. Our own cookies make user accounts and other features possible. Third-party cookies are used to display relevant ads and to analyze how Renderosity is used. By using our site, you acknowledge that you have read and understood our Terms of Service, including our Cookie Policy and our Privacy Policy.
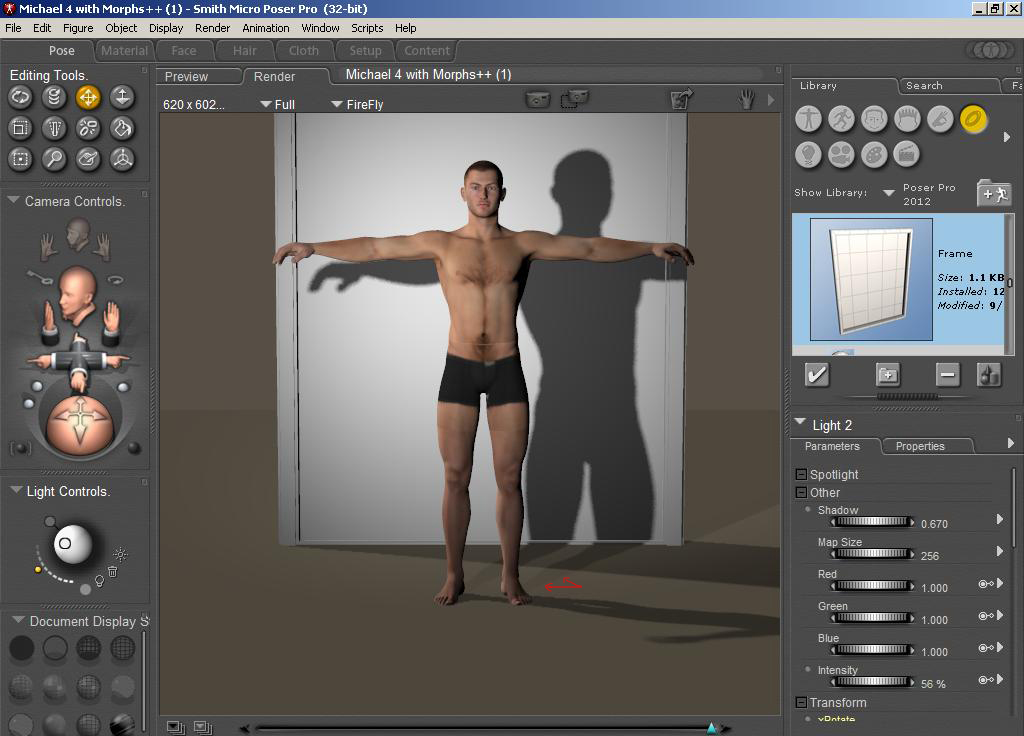
I've been practicing and learning a bit about lighting. Right now, i understand most of the basics of lighting, such as using indirect lighting, the 3 point lighting system, etc. And i understand most of the light settings and render settings, like decreasing the shadow min bias to around .1-.3 for raytracing and things like that. But i'm having a little bit of trouble controlling the shadows. I uploaded a pic to show what i'm talking about.What i notice, is that in a lot of pictures that have a character with some kind of close background, like a wall, have their shadow showing on both the wall, and another separate shadow showing on the ground. I've been told it's good to have that shadow on the ground in the front of the character as well. So what i did, was create a simple scene, with a default michael 4 and a primitive plane wall in the back. I used a raytraced spotlight to create the shadow on the back plane. Then i created an infinite light, decreased it's intensity, and angled it to get the shadow on the ground.
Now look at the part of the shadow where the red arrows are pointing. The other light seems to lighten part of that shadow in that particular area. Is this a bad thing, and if it is a problem, how would i fix this? Or am i'm just making an issue out of nothing? Also, how would you guys shadow a picture like this, where there's a character with a wall behind him. Shadow in the back, or on the ground, or both? One important thing i should also mention, is that other than a few months of using poser, i have no artist background, so i might be missing things that can easily be spotted by a regular artist. Any other shadowing tips also would be appreciated =)