Renderosity Forums / Photography
Welcome to the Photography Forum
Forum Moderators: wheatpenny Forum Coordinators: Anim8dtoon
Photography F.A.Q (Last Updated: 2024 Nov 26 6:56 am)
Subject: B&W from color
Both are great. Tough choice. Have you tried cropping out some of the foreground sand. Doing so would also give it a wider look.
Kort Kramer - Kramer Kreations
I noticed that TwoPynts was wondering,
Have you tried cropping out some of the foreground sand.
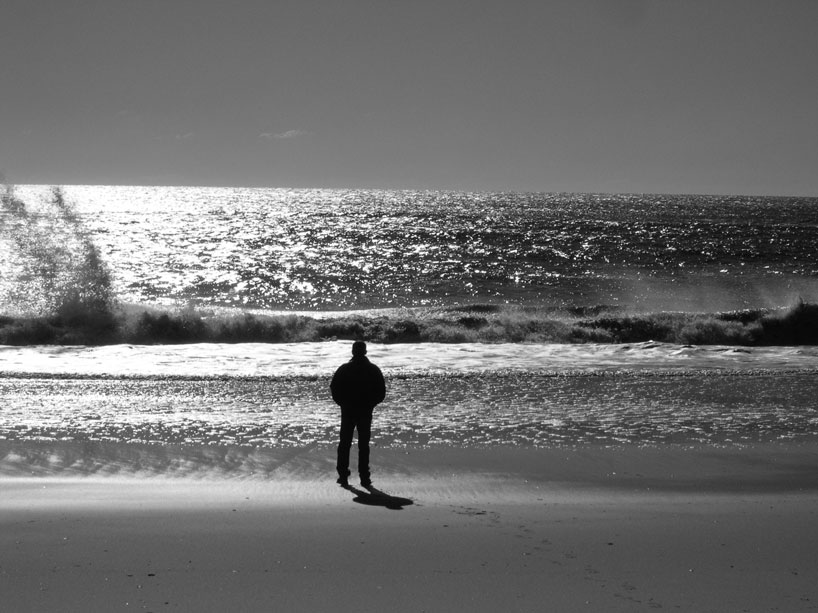
Part of what I have in this image is the sense of solitude ... almost isolation
of the subject -- he is right at the water's edge and IMO -more- sand rather
than less would increase that sense of isolation.
BTW, when I made test prints, the results didn't have the range of black
and white as what I can see on my monitor.
I need to think about what would improve how this image printed on my
Canon PIXMA IP-5000. This printer has 5 ink tanks: CMYK, which are
dye based, and also a pigment black.
--
Martin
p.s. What did I learn today? That I know a little less than I thought I did.
I'm happy you are enthusiastic and get good results, but I did not invent this. I only learned it, so don't make me blush, ok?
Another thing you can do is convert to duotone. You can't access duotone in one movement though. First, after having played with- and got your greyscale image, you have to switch to greyscale mode( Image>Mode>greyscale) and then, in a second step, you can set to duotone (image>mode>duotone). Here you have the option to choose between duotone (two colours) tri- and quadtone (three and four colours) In fact these are created for printing on offset-presses, mainly to use ink / colours whose hues cannot be mixed with the basic cyan, magenta, yellow and black, but you can use them to your benefit. Even for internet display.
Choose for example duotone (tri and quad work the same, but with additional inks, so you simply repeat this for the other inks.).
In the dialog, you see "black" and an empty rectangular space below it. Doubleclick there, and a dialog opens where you can choose a colour. This colour will be mixed with black. Choose one, and say "wow" (necessary!). Try several untill you find what you really like.
Then you can doubleclick the small curve that's on the left of the colour in the duotone dialog. It will pop-up, and you can adjust like you fancy. Don't be afraid to try out some weird curves. You'll certainly be inspired.
When you get a result you like, switch back to rgb (image>mode>rgb)
This way, by choosing a second colour, you get a far more rich result. Because when you use only grey, your three channels, r,g, and b are identical. This reduces the possible hues. By choosing a second colour with a barely visible hue, not only you can get a result like old photographs, but you get different information in each channel, which leads to richer results.
and the cherry on the pie is that when you use four inks (quadtone) and you set your curves in special ways, you can get subtle hues depending on the lightness of the photo. "experiment" is the verb that applies here.
Now if this isn't fun!
There are no Borg. All
resistance is fertile.
I've done a lot of tutorials when I got photoshop 7 and asked questions on some photoshop forums. I also got Gary Bouton's Inside Photoshop 6, which was really cheap (because outdated) but he explains the basics very well. Also, I work as an offset-printer and do some occasional pre-press work, depending on the needs and the available personnel, so I got a practical foundation.
There are no Borg. All
resistance is fertile.
My thanks to Tanchelyn who responded by saying,
also got Gary Bouton's Inside Photoshop 6, which was really cheap
You're right ... amazon.com has ...
Inside Photoshop 6 (9" x 7" x 2", 1320 pages) for $4.57 (+ S&H);
and Inside Photoshop 7 (9" x 7" x 2", 1056 pages) for $2.00 (+S&H).
Sounds like a bargain -- I'll get one
--
Martin
Privacy Notice
This site uses cookies to deliver the best experience. Our own cookies make user accounts and other features possible. Third-party cookies are used to display relevant ads and to analyze how Renderosity is used. By using our site, you acknowledge that you have read and understood our Terms of Service, including our Cookie Policy and our Privacy Policy.


In the thread, "Photoshop Vs Film question" started by **promiselamb**, I saw a hint from **Tanchelyn** that related to creating a B&W image.That made me wonder what would happen to "Solitude", an image shot on
New Year's day in the Hamptons.
I did a quick trial with this result.
--
Martin