Renderosity Forums / Photoshop
Welcome to the Photoshop Forum
Forum Moderators: Wolfenshire Forum Coordinators: Anim8dtoon
Photoshop F.A.Q (Last Updated: 2024 Nov 21 7:35 am)
Our mission is to provide an open community and unique environment where anyone interested in learning more about Adobe Photoshop can share their experience and knowledge, post their work for review and critique by their peers, and learn new techniques while developing the skills that allow each individual to realize their own unique artistic vision. We do not limit this forum to any style of work, and we strongly encourage people of all levels and interests to participate.
Sharpen your Photoshop skill with this monthly challenge...
Checkout the Renderosity MarketPlace - Your source for digital art content!

Subject: Removing red pen from a black and white photo.


You can use the clone tool and set the blend mode to color, next to the brush thumbnail in the upper bar. You will probably still see some greystripes, but the parts that go unnoticed after removing the color keep you from doing too much stamping. Try the healing brush for the parts of the remaining lines that go over the ground. I suppose the parts that are still visible on the soldiers and such need zoomed in cloning tool work, with a small brush size, a relatively low opacitiy and a lot of option-clicking to use different parts as a source (a Wacom pen is nice to have around for subtly 'painting' away stuff, because you can handle the opacity by pressure) to prevent repeating paterns and visible repairs. Good luck! BTW I hope you have a much larger file to work on then this jpg, size matters, in this case.

You should scan your photo at resolution of 300 or more. The higher the better. GIF and JPG are compressed (lossy) files and should only be used as final product if it's for the web.
Since I only had a jpg to work with, the final results aren't very good.
- Image > Mode > Grayscale (since the only real color is the red that you want to get rid of
- Image > Adjustments > Shadow/Highlight .. Put shadow at 100% and repeated a 2nd time at 100%
- Image > Mode > RGB
- Filter > Sharpen > Unsharp Mask
- Zoomed in to spots with lines and use Patch Tool and/or Healing Brush Tool
- Image > Ajustments > Photo Filter and selected Sepia from filter menu pulldown to give aged color to photo.
There are many ways to achieve a quality restore and some are quite involved. This was the easiest to explain.
BTW the tinker key is next to the any key ;)

Privacy Notice
This site uses cookies to deliver the best experience. Our own cookies make user accounts and other features possible. Third-party cookies are used to display relevant ads and to analyze how Renderosity is used. By using our site, you acknowledge that you have read and understood our Terms of Service, including our Cookie Policy and our Privacy Policy.
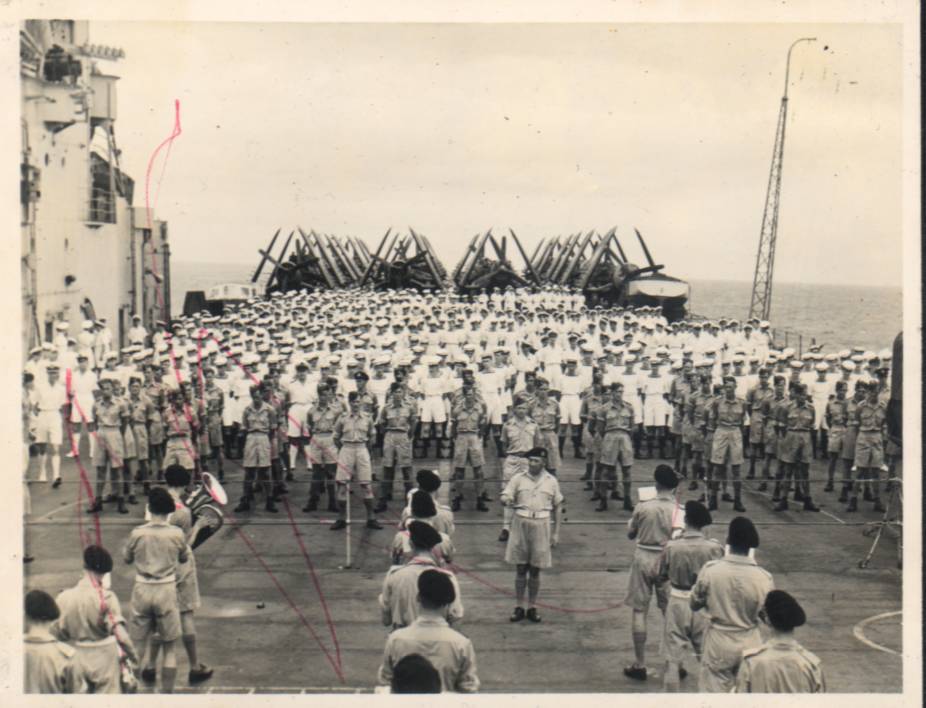
I have started using photoshop relatively recently.At the moment I am going through old family photos and digitally enhancing them.
Some of them have suffered at the hands of an enthusiastic baby with a red pen. (It is entirely possible that this was me in a former life)!!
Does anybody have a method or link to a tutorial for removing the red pen but not the underlying image?