Renderosity Forums / Carrara
Welcome to the Carrara Forum
Forum Coordinators: Kalypso
Carrara F.A.Q (Last Updated: 2025 Jan 20 11:31 am)
Visit the Carrara Gallery here.

Subject: Parallel Offest, Shelling, Thickening?


I have a little bit more info about what is happening here, since I read Angel's first post on this over in the 3D apps forum. It seems a boolean difference has been used to make the figure have a wall thickness for rendering a transparent effect. The problem is that the object used in the subtraction was a slightly scaled down version of the figure, which intersected the larger figure in several places, and has removed parts of the larger mesh. The way to do this is use an app that can do parallel offset, shelling, or thickening. It's all the same function, but some apps refer to it differently. Chris


The route should be: - import the figure (you import it in the main window first) - double-click the figure - now it looks like something is wrong - there isn't - go to edit > Convert to Other Modeller - choose the Vertex Modeller - it appears in the Vertex Modeller (sometimes rather small, but zooming resolves this) I see in your preview above that your figure has four or five parts.You can convert it to one big mesh with a Boolean operation. Or export as dxf and reimport (which might resolve the tiny size in the Vertex Modeller too, now I think about it). The figure I used above was the Casual Woman (Poser 2 or 3 if I remember correctly), in which the clothes were integrated in the mesh. I did not want tot start throwing naked girls around, when we are clearly talking angels.
Nature is a beautiful thing, in any context, thanks for your tutelage! In our case it is also the simplest form of expression and help, it must have taken an extra effort to dress her... The only thing I have against .DXG VS. .OBJ is that I sometimes need to smooth a .DXF. WHich Boolean operation were you speaking of?
Attached Link: Transposer on the site of Carrara
(She was dressed to begin with) A boolean union of the wings and the back of the figure (they need to intersect for that). You can do that in the Assemble room ( edit -> 3D Boolean) Nope, the UV information is lost when exporting as a .dxf But I thought that a glass shader would be procedural, then it is not a problem. My favourite transfer format is 3ds by the way, also when exporting from Poser. You get to choose to export as groups for each bodypart and all, it takes more time to re-texture them in Carrara, but you have more possibillities to change stuff (or parts) without affecting the UV coordinates in the rest of the figure. I wish I had more time to experiment myselve, but time might be on the side of them Rolling Stones, it is not on mine. I am running to get by it... Good luck! O, and now of course there is TransPoser. See the link. That makes working with Carrara and Poser a breeze, as far as I have heard these days.
Attached Link: http://www.renderosity.com/messages.ez?Form.ShowMessage=1712184
Thanks, sorry to hear of your time restraints. Ok so exporting as .DXF or Select All>Edit>3D Boolean>Boolean Union should help? Would either or solve the mapping problem I'm having at the above link?


Hoof - Did you get all of your moving finished, these were wonderfully fast, I hope you've had time to rest! These screenshots give me a great idea of what to expect. I've saved this post to floppy and will be bringing it home in a few minutes. My first only real concern though is how you get to them? For the first I plan to select my object and then look to the propeties pallette for the transorm option, but I swaer I would have tried this already. I also see something about splines wich I will be looking for. For the second screenshot I'm hoping to find these otions after just selecting my "Scene" from the properties pallette. Thanks again for for all your help, please take your time getting back here(Just do'nt forget.), any reply will be appreciated!
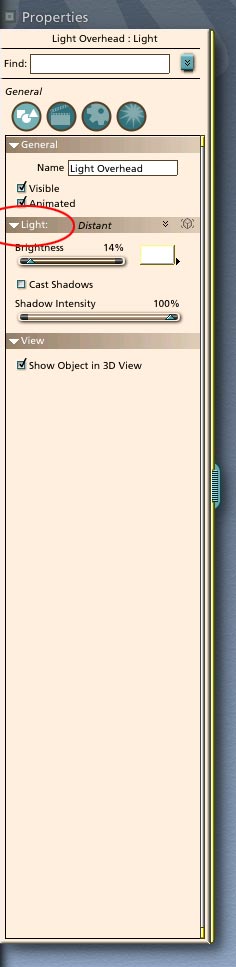
Hi all, Hoof has been a huge and I would just like to start off again today by saying thanks, and that I hope his moving endeavors are starting to gain some organization for him! I forgot to bring my latest pics with me, but I was able to move things around much more acurately, thanks to Hoofs posts! Although I'm not getting much of a differance between my DXF and OBJ import renders. I then had another try at 3D Boolean, but once I had my figure and a smaller copy of it selected, the Edit>3DBoolean option was not lit? Another thing I began to wonder if there is a way for is positioning things at the same coordinates quickly, can this be done fast somehow? And finally, I'm now wondering how the default lights work. Do they project light similar to a spotlight, or dfo the imminate light in all directions? Is there a way to get them to imminate? = )
Hi all, Hoof has been a huge and I would just like to start off again today by saying thanks, and that I hope his moving endeavors are starting to gain some organization for him! I forgot to bring my latest pics with me, but I was able to move things around much more acurately, thanks to Hoofs posts! Although I'm not getting much of a differance between my DXF and OBJ import renders. I then had another try at 3D Boolean, but once I had my figure and a smaller copy of it selected, the Edit>3DBoolean option was not lit? Another thing I began to wonder if there is a way for is positioning things at the same coordinates quickly, can this be done fast somehow? And finally, I'm now wondering how the default lights work. Do they project light similar to a spotlight, or dfo the imminate light in all directions? Is there a way to get them to imminate? = )


I noticed, in many renderers(especially Poser) that too many lights tends to wash a figure out. I'm concerned this may be the case again here. So, what I want to do is make keyframes with certain lights deleted. I think the sequncer is pretty staight forward, but I'm wondering if there is a trick to making notes for each keyframe. This way I can keep the camera angle a little closer, and still follow wich lights I'm using.
Also, regarding adjusting lights, can we adjust several lights at one, maybe by linking them somehow?
About the Infinite Plane, how can I add a material, or change it's color? I did'nt notice it in the Properties pallette, how is it getting it's value now?
When I exported this .OBJ from, Poser5, I made sure all of each figures parts were included, but I ca'nt seem to locate any figure's individual parts. Take the loin for example, the trim on the top and bottom are two different parts, while the cloth represents another dozen parts that need adjusting.
The next thing I started to wonder was how to change the document window size numerically. I could find where to adjust the render's dimaensions, in the render room, but not the scene's properties?
Finally, onece I've some of my other issues in hand, I'd most likely be compositing my renders in photoshop, and will be needing to know how to make an Object Mask for my figure? Most renderers can do this. All it is, really, is a black and white(No grays), render of a figure, to use in a photoshop Alpha Channel for making selections.

It renders like this, but now I've more questions about how to get where I'd like to be next:
I noticed, in many renderers(especially Poser) that too many lights tends to wash a figure out. I'm concerned this may be the case again here. So, what I want to do is make keyframes with certain lights deleted. I think the sequncer is pretty staight forward, but I'm wondering if there is a trick to making notes for each keyframe. This way I can keep the camera angle a little closer, and still follow wich lights I'm using.
How about making area renders? When you select the small camera you can get a quick look at the render result. With the small icons on the right side of the work area you can choose multiple views, in the small view you can select lights and toggle them on and off, in the larger area you can do a render by just dragging the camera around the figure, or part of the figure.
Also, regarding adjusting lights, can we adjust several lights at one, maybe by linking them somehow?
You can create a masterlight, by promoting one to that under 'edit'
BUTIt looks like you are mimicking some kind of global light situation (with light from all sides) while 'Global Illumination' is actually part of the renderer of C3. You can use the sky, or other stuff in the 'Scene' thing called 'Background' to light your model, you can even use hdri files, this image is done with one light, the rest of the global light comes from the hdr picture.
About the Infinite Plane, how can I add a material, or change it's color? I did'nt notice it in the Properties pallette, how is it getting it's value now?
Like you can change the shader of any object you can change it by selecting it and go to the shader room, or in the properties tab, choose one of the presets or click the edit button (which will take you to the shader room)
When I exported this .OBJ from, Poser5, I made sure all of each figures parts were included, but I ca'nt seem to locate any figure's individual parts. Take the loin for example, the trim on the top and bottom are two different parts, while the cloth represents another dozen parts that need adjusting.
When exporting you get to choose if you want to export seperate groups for each body part, do that. By 'adjusting', do you mean adjusting the mesh, or the shading? For shading you will find, in the shading room, different shaders for each part that has had an UV map area for itself (I did not put a shader in the 'lips' part in this case). For me the .3ds file format is best because you get a lot of shading information in the file.
The next thing I started to wonder was how to change the document window size numerically. I could find where to adjust the render's dimaensions, in the render room, but not the scene's properties?
Finally, once I've some of my other issues in hand, I'd most likely be compositing my renders in photoshop, and will be needing to know how to make an Object Mask for my figure? Most renderers can do this. All it is, really, is a black and white(No grays), render of a figure, to use in a photoshop Alpha Channel for making selections.
In the render room, click the tab 'Output', specify the Photoshop file format, and you can choose additional channels to render, like alpha and premultiplied alpha (which antialiases with the background color) but also depth channel and some others which can help in compositing and playing with the render afterwards.
Hope this helps again!
This render of yours is lit excellently! What is meant when Carrara artists say "Indirect Light", I've seen this specific term used in caps a few times now? Where did you find a Carrra HDRI file, can you trade/share with me? I would definately be willing post whatever it is of my stuff you may like, to the Free Stuff area! I'm also a bit miffed by what extra channels you were refering to, and how they associate with "Extraction?" and Depth of Field "in post?" By adding a shader to the Head and Body, did you lose data from any 2D texture that may have been mapped to the figure, and if so which shader did you use, this is really a potentially awsome scene, the ambience of the skin is so bright it almost looks like he is glowing. I would very much like a copy of this scene, to use a few times over! I just wish the feet did'nt wash out at all. I'm hoping this is an intentional effect. How about making area renders? When you select the small camera you can get a quick look at the render result. With the small icons on the right side of the work area you can choose multiple views, in the small view you can select lights and toggle them on and off, in the larger area you can do a render by just dragging the camera around the figure, or part of the figure. I'll be hoping to keep the recycle some of the light sets, for different renders, I think? Of coarse I may find a favorite! You can create a masterlight, by promoting one to that under 'edit' BUTIt looks like you are mimicking some kind of global light situation (with light from all sides) while 'Global Illumination' is actually part of the renderer of C3. You can use the sky, or other stuff in the 'Scene' thing called 'Background' to light your model, you can even use hdri files, this image is done with one light, the rest of the global light comes from the hdr picture. That is correct, but I'm still using C2. I'd like to upgrade this month, but will be needing to see how things go. About the Infinite Plane, how can I add a material, or change it's color? I did'nt notice it in the Properties pallette, how is it getting it's value now? Like you can change the shader of any object you can change it by selecting it and go to the shader room, or in the properties tab, choose one of the presets or click the edit button (which will take you to the shader room) I see, but how do I select it, there is no "Infinite Plane," or "Ground" listing in my Properties Palette? I should have brought a pics of my palette and sequencer. When I exported this .OBJ from, Poser5, I made sure all of each figures parts were included, but I ca'nt seem to locate any figure's individual parts. Take the loin for example, the trim on the top and bottom are two different parts, while the cloth represents another dozen parts that need adjusting. When exporting you get to choose if you want to export seperate groups for each body part, do that. By 'adjusting', do you mean adjusting the mesh, or the shading? For shading you will find, in the shading room, different shaders for each part that has had an UV map area for itself (I did not put a shader in the 'lips' part in this case). For me the .3ds file format is best because you get a lot of shading information in the file. Aha, thanks! I was refering to shading. I was leaning toward .obj, but just becasue I've been assuming we would'nt want to mix shaders and mapped textures, allthough from the idea I'm getting some of the shaders you've chosen mimic realistic textures much better than I'd imagined! In the render room, click the tab 'Output', specify the Photoshop file format, and you can choose additional channels to render, like alpha and premultiplied alpha (which antialiases with the background color) but also depth channel and some others which can help in compositing and playing with the render afterwards. Thanks for all your Help Hoof! Your IM was right in saying there are many places I need to get my head around, and the manual is alot of help, but it just is'nt like conversing with a person, even if it is through a forum post like this. I live for these forums, I learn so fast with them I do'nt concentrate on any other method that much at all(Including college!) 3 Cheers for Hoofdcommissaris! Hip, hip, Who-Ray(Trace... = ) !) Hip, hip, Who-Ray! Hip, hip, Who-Ray!


Attached Link: http://www.renderosity.com/messages.ez?ForumID=106&Form.ShowMessage=1735009
BTW - I started a new thread, with a few more questions, at the attached link. = )
This render of yours is lit excellently! What is meant when Carrara artists say "Indirect Light", I've seen this specific term used in caps a few times now? Indirect Light is similar to 'radiosity' in a lot of other packages, the bouncing of light between different objects and surfaces. In Carrara 2 it is integrated in the advanced render, in C3 you can choose Sky Light and Indirect Light independently, that's why people started throwing those caps around. HDRI is new for version 3, you can choose an HDRI file as lighting source in the 'background' tab of the scene. Those are not Carrara specific. There are some free ones around the web, a fair group on the C3 CD and you can buy them on CD's and DVD's from Dosch Design and Sachform (to mention just two companies) I'm also a bit miffed by what extra channels you were refering to, and how they associate with "Extraction?" and Depth of Field "in post?" When you render an alpha channel along with just the color of your render, you get additional information. The alpha channels (found in the aptly named 'channels' tab) are not just black and white, but all greys from 0 to 256. The 'disappearing' feet are a demonstration of that. When you check the 'Distance' box, you get an alpha channel that you can use in Photoshop. When you option/command click it, and turn it into a selection, you can use that with several passes of low Blur amounts, to create depth of field. In post. Or to create color fall-off, by filling a layer with color and experiment with layer blend modes. Like I did to get some kind of 'heavenly' atmosphere. The same goes for the alpha mask. It is in the channels, and you need to make a selection from it and extract the figure from the layer (command 'J'). By adding a shader to the Head and Body, did you lose data from any 2D texture that may have been mapped to the figure, and if so which shader did you use, this is really a potentially awsome scene, the ambience of the skin is so bright it almost looks like he is glowing. I would very much like a copy of this scene, to use a few times over! I just wish the feet did'nt wash out at all. I'm hoping this is an intentional effect. The shader actually uses the 2D data from a HiRes Michael Texture Map I altered some years ago, for the pixel color. The other factors that make up the appearance of a shader (shininess, bump, reflection) are also part of the total shader tree. The bumpmap is also a jpg map, shiness is just a (low) value. I cannot share this scene, becaus Michael is a DAZ figure you need to have license to use, as is the original texture map. I will check your other thread too.
Wow that was a very good answer, sir! I ca'nt wait to bring this home and read it again, then I can write an appropriate response. Are you at all interseted in sharing the scene without DAZ's geometries. I realize I do'nt have your specific texture, but the lighting, in the Carrara file, does seem very well put together! = )
Wow that was a very good answer, sir! I ca'nt wait to bring this home and read it again, then I can write an appropriate response. Are you at all interseted in sharing the scene without DAZ's geometries. I realize I do'nt have your specific texture, but the lighting, in the Carrara file, does seem very well put together! = )
The lighting actually is just a hdri file (17Mb in size), that surrounds the scene and lits it, an hdri file being a kind of light-emitting real life image (there are no lights in the scene). But you can only use it in Carrara 3. I thought you were using that. There is a nice demo on the Eovia site. A light dome around your scene can be an alternative (a large sphere, sometimes with an open back to stay out of frame, surrounding the scene with a huge amount in the glow channel, by multiplying white with a scale of, like 1500%), you can find information about that around here. I never tried it, so i do not know a lot about it. If you have time and a bit of a fast machine you can experiment with different light and render settings (and 'ambient light' settings as well) to see what works in C2. Keep up the experiment!
Privacy Notice
This site uses cookies to deliver the best experience. Our own cookies make user accounts and other features possible. Third-party cookies are used to display relevant ads and to analyze how Renderosity is used. By using our site, you acknowledge that you have read and understood our Terms of Service, including our Cookie Policy and our Privacy Policy.
Can Carrara 2 do any of these? If not could anyone suggest an application that can? I'd like to take this P5 character, and make a model to apply transparent materials, in Vue4 and Bryce5! As you can see V4 Boolean Differance wo'nt cut it.