Renderosity Forums / Photoshop
Welcome to the Photoshop Forum
Forum Moderators: Wolfenshire Forum Coordinators: Anim8dtoon
Photoshop F.A.Q (Last Updated: 2025 Jan 14 1:57 am)
Our mission is to provide an open community and unique environment where anyone interested in learning more about Adobe Photoshop can share their experience and knowledge, post their work for review and critique by their peers, and learn new techniques while developing the skills that allow each individual to realize their own unique artistic vision. We do not limit this forum to any style of work, and we strongly encourage people of all levels and interests to participate.
Sharpen your Photoshop skill with this monthly challenge...
Checkout the Renderosity MarketPlace - Your source for digital art content!
Subject: Photo to Coin


Thanks heaps in advance.
Neil

Hoof, It looks like the B/W image is the better of the two(2) The shadow on the right side of the nose is still giving me fits. Unfortunately the shadow is what gives the photo depth. I guess it's not that important for what my purposes are. As the photo is looking more and more like a woodcut all the time. I do have and image that is 9" x 7" @ 400dpi. My G-code software doesn't want to handle that on very well though. Orion, Sorry for stepping all over your message. I hope you can get as much from this as I'm getting. Thanks guys. Neil
Mmmm. The nose needs work (just the one in the file, not her real nose of course ;-). And, I think you need to use the other version, now the face will be pressed into the coin, isn't it? I can not judge if this is a preview of the coin, or of the form the aluminium will be poured in. This looks rather acceptable, doesn't it ? The white shirt under her black sweater give the 'wrong' message, but it looks kind of royal, like she is wearing a robe with gems on it or something... I will post the nose job asap. You do not have a larger file to work from? I can try to reduce the noise that makes her skin look, well, noisy.


i was thinking very briefly about it, my answers were for creating one that looked good in Photoshop. Simply put high pass will reveal where contrast is. starting with the original pic, turn it into a 72 dpi image , that is about 600 pixels wide. do this useing the menu, image size. click ok, when done. save as. 72dpi.psd. ok. duplicate the background layer once. apply the filter 'highpass. to the background layer. use 3 pixel radius?. fade the layer abouve it by changing the layers opacity try 50%. go to the layers menu, i think and flatten image. paint the image area that you don't want black. i'd be interested to see how it resolves (forgive my dixlexic spelling)
Privacy Notice
This site uses cookies to deliver the best experience. Our own cookies make user accounts and other features possible. Third-party cookies are used to display relevant ads and to analyze how Renderosity is used. By using our site, you acknowledge that you have read and understood our Terms of Service, including our Cookie Policy and our Privacy Policy.


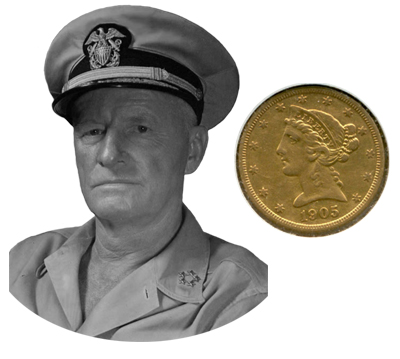
Does anyone know of a good technique for making a b/w photo look like a gold coin? I'm using PS-7, but I've just bought CS. (Not installed yet, but I will install it if the job is easier in CS.)The attached photo is a jpeg of the image I'm trying to use, along with a shot of a random coin, just to show the basic look I'm trying to create. In the PSD file, the b/w portrait is already cut out and ready for whatever filtering/manipulation is required.
I've seen one tutorial for using a displacement map for doing it, but the final result didn't look realistic enough.
Any help would be greatly appreciated. I'll do the work, I just need a little advice on how to go about it.