Renderosity Forums / Poser - OFFICIAL
Welcome to the Poser - OFFICIAL Forum
Forum Coordinators: RedPhantom
Poser - OFFICIAL F.A.Q (Last Updated: 2025 Jan 12 9:36 pm)
Subject: Tutorial - HDR Shop with any background image

Very nice tutorial. It reminds me a lot of Eric Van Dyke (Traveler)'s Poor Mans HDRI tutorial. But, your images use a later version of Poser. ;)
VanishingPoint... Advanced 3D Modeling Solutions
Attached Link: http://www.renderosity.com/mod/gallery/browse.php?user_id=27965
I haven't seen that tutorial before, but yes it's basically the same principles. This tutorial was made using Poser 6, but it works for Poser 7 as well. I haven't tested it in Poser 5.For examples on how HDR Shop images might appear, you can check out my gallery here to decide whether it is something you desire to implement into your renders.
Hope this tutorial is helpful...
Attached Link: http://www.renderosity.com/mod/gallery/index.php?image_id=1217007&member
Try to reimport your background. When it tells you that it will change the dimensions of the preview window, click OK. The background you selected has no natural light. It's still okay, but it means that you will have to change the color of some of the lights and possibly reposition a few.It's what I did for the image in the link - so it can still look natural.
Attached Link: http://gl.ict.usc.edu/HDRShop/
HDR Shop is a program from which you can create light files that can be imported into poser.Would this method also work on background images pasted to primitimes, such as flattened cubes or curved surfaces? With a bsckground image pasted to a primitive, I can use displacement and bump values to enhance the 3d effect.
DPH
STOP PALESTINIAN CHILD ABUSE!!!! ISLAMIC HATRED OF JEWS

DP:
It could be done that way, but remember your background image is blurred to provide depth of field. Plus, too many curves could cause the lights strange angles on your background. But feel free to experiment and see if it works for you.
Privacy Notice
This site uses cookies to deliver the best experience. Our own cookies make user accounts and other features possible. Third-party cookies are used to display relevant ads and to analyze how Renderosity is used. By using our site, you acknowledge that you have read and understood our Terms of Service, including our Cookie Policy and our Privacy Policy.


Attached Link: http://www.physicalc-software.com/tutorials/ibl/

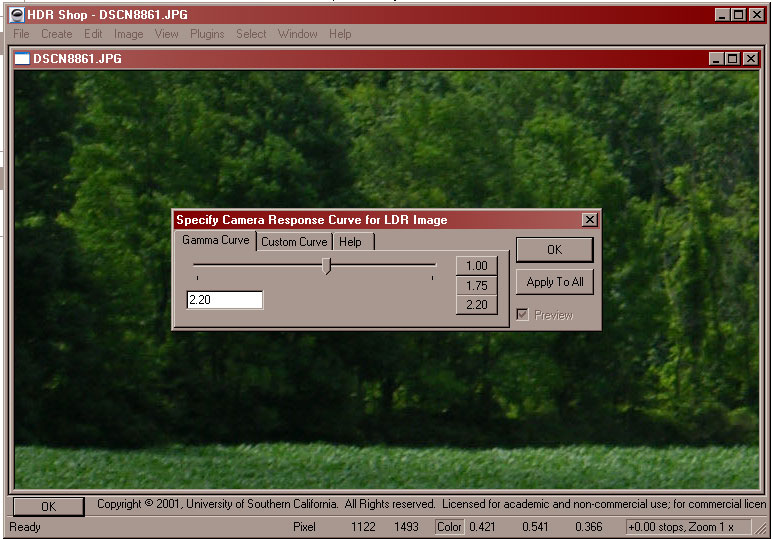
I've gotten some interest in how I create my images. My technique is derived from a tutorial by face_off.First, in HDR Shop load the image that you want to create you image-based lighting from. Go to File --> Open and select your image. A pop up will appear, just click "OK".