Renderosity Forums / Poser - OFFICIAL
Welcome to the Poser - OFFICIAL Forum
Forum Coordinators: RedPhantom
Poser - OFFICIAL F.A.Q (Last Updated: 2025 Jan 29 10:50 pm)

Subject: richardson's realism rendertime reduction regime...#^p
- 1
- 2


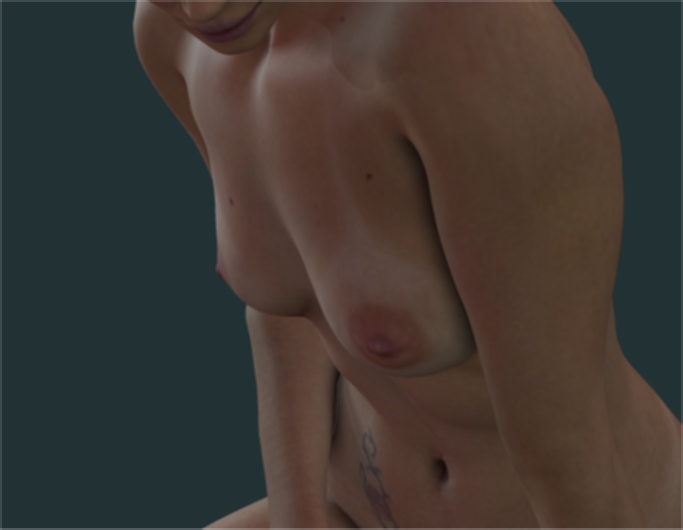
What happened to "EDIT"? On anistropic....0.01x0.07, thereabouts. It just controls the stretch and scale. Control intensity with Spec value on the node. Generally, you turn off AO on light if you use AOmaster. Just remember to run AOmaster on all your Props, ground, etc. that need a contact shadow. AO on light has a bad effect on human ears, eyes, hands. Bad on buildings too unless it's set perfect. It's a great thing for draft renders, though (used above). That rendered in about 5 minutes with head and 3dream hair(1/2). Cropped out head and legs for simplicity. Hair....visible in RayTrace may be necessary for AO...not sure. Short hair,,,pubic hair do not need the time drain of shadows and most look better without. Long hair,,,well for final you better have at least shadows ON. Yours,,, linkdink. Hope it helps


Excellent set of tips. Thanks!
The pen is mightier than the sword. But if you literally want to have some impact, use a typewriter


bm
A ship in port is safe;
but that is not what ships are built for.
Sail out to sea and do new things.
-"Amazing
Grace" Hopper
Avatar image of me done by Chidori.


Nice one richardson, wanted to thank you aswell, as i went to your profile the other week (was fascinated by your avatar, looks like a poser version of Ingres' "the turkish bath") but got destracted on the way, as you had in your favs a picture by Beton , his picture "stranded" was the image i saw a long time ago that actually got me interested in cg based art. so i wanted to thank you because without seeing your avatar i would never of found out that Beton posts here at Rendo', though the finding of Beton's gallery distracted me from seeing what i clicked on your profile for in the first place, and that was your version of the Ingres painting, do you have that image in your gallery?so thanks for the tute and thanks for the link to my original inspiration into cg.
Have a Magic day!
Vince.

Thnaks for sharing this - this went to my harddrive immediatly, it may save me from playing Rumpelstiltskin here and there. And now I hope for a solution for large sized portraits with the whole shebang 
I'm not always right, but my mistakes are more interesting!
And I am not strange, I am Limited Edition!
Are you ready for Antonia? Get her textures here:
The Home Of The Living Dolls

Nice tips. But I want to see the figure's head, eyes, and hair - then tell us how long to get the resulting render. ;p Skin is skin, but hair and eyes are the be-atches.
Robert
C makes it easy to shoot yourself in the
foot. C++ makes it harder, but when you do, you blow your whole leg
off.
-- Bjarne
Stroustrup
Contact Me | Kuroyume's DevelopmentZone


Quote - Less than you may think. I rarely render over 1024 max texture res. I never go higher than 2048. Shading rate at 2.00. No filters. No smoothing unless it's close... RayTrace bounces at 0.00-1.00 unless there are mirrors or a closeup. Pixal samples at 3
RayTrace ON
Shadows ON
Use displacement maps ON
rendering a 4096 pixel texture at 1024 max texture res destructs 3/4 of the detail and saves very little time on a render.
with a min. shading rate at 2.00 you basically blur and pixellate the rest of the texture into oblivion. while it works OK in your render because its sortof a low contrast low-lit render, this would completely destroy a face texture.
yes, with a shading rate set to 2.00 you are rendering much faster -- but thats mainly because you are dumbing down the textures to nearly the detail level of a simple flood fill.
its all about compromises. i would rather wait 2x as long for something to render and have all of the detail, than to render half the detail in half the time. i bump up the shading rate to 2.00 or even higher for quick preview renders, and reduce the pixel samples to 1, but i will never render a final render at anything but 0.00 shading rate - which is full detail. lately, because i do not like the pixellation along the edges of the body, i have even been rendering with 18x antialiasing.
different strokes for different folks, i suppose. some people are more interested in speed. i am most interested in every ounce of realism i can squeeze from the firefly renderer, and if someone is going to spend weeks painting detail in a texture i want to render all of that detail -- if youre just going to destruct the texture to 1024 max size and 2.00 shading rate then you might as well just use simple freebie textures since there will be little difference in the final result.
give me a minute and i will illustrate the difference between something at pixel samples 3 and 18. in fact i think for my next big render im going to try 36, because i still notice jaggies along the thighs, etc.
i have 2 computers so i can afford to tie one up in an hour long render. but if i didnt, or had a slow computer, i would simply do what i did before i had dedicated rendering machines -- i would do all my preview renders and set up a scene the way i liked it, and just hit 'render' before i went to bed. even complex MAX renders with global illumination are done in that period of time. its all about what is important to you. speed is great, sure.. but if im going to make something i will post in my gallery then why not spend an extra hour rendering and get more detail out of it? i never compromise when it comes to quality.
great tutorial btw. dont get me wrong - i am not disagreeing with you simply offering my alternate viewpoint concerning render detail vs speed. different people have different priorities, perhaps someone who only has an hour of time for poser every day and shares their computer will obviously place speed as a priority over quality. i do this for a living so i am generally here all day, so i have different priorities.
cheers,
-gabriel


i used the settings you listed above, and where you listed a setting range (ie: 1-10) i picked the mean value.. and also my own settings that i normally use in a production quality render. timing is approx, i jotted down the minute i started and the minute it finished, so i could be off by up to 60 seconds either way.
images were exported out of poser as uncompressed .PSDs, the text was added and they were exported from photoshop at 80% quality. this is what i would expect from a gallery render.
suffice to say i use similar settings as the quick render in just 'setting up' a production render, but no matter how slow a computer i had i would never submit something like that in my gallery much less use it as a product promo. IMO toying with the render settings in such a way has a very useful application in saving time in any non-final render where one is tweaking lighting, shadow, textures, pose, etc... but if you are going to spend hours setting up an image, postworking it, etc then you are doing both it and yourself a disservice by reducing texture quality and shading rate.
cheers,
-gabriel

and by no means is that what id call an 'ideal' render, just something i slapped together for this.
but i will break down the massive importance of some of the settings that are compromised on with this post.
-
antialiasing. pixel samples.
a big giveaway in 3D is when the edges of your character are jagged and pixellated. this jaggedness never occurs with a film camera - negatives can be enlarged to a theoretical infinite size without it appearing.
yes, it has a drastic impact on rendering speed. but in many renders a low antialiasing will result in a very noticeable jaggedness around edges. a good compromise is around 5 -- i actually used a pixel sample setting of 4-5 for years, its just lately that i am bumping it up to around 18 or so because it looks better and ill gladly add a half hour of rendering time to squeeze the most out of my render. -
shadow min. bias
shadow min bias basically determines the detail level of the shadows. the poser default is inadequate even for nostrils, eyelashes, etc. a shadow min bias of 1.0 is far too high. i generally use around 0.12-0.15, and will only start raising it in .01 increments if strangeblack artifacts start to appear (this is actually caused by polygons self-shadowing). the lighting angle is bad for this one (i didnt adjust it for this render), but with the shadow min bias setting in the high quality render the eyelashes, nostrils, even the eyelids are casting shadows. with proper lighting this makes a huge difference. with a high shadow min bias small detail like eyelashes, clothing hems, etc WILL NOT cast shadows. suffice to say a render without fine shadow detail under clothing hems, for example, will not look realistic at all. -
max texture size
this does not really affect render speed that much. you are doing a huge disservice to your texture creators by completely eliminating the detail they spend weeks painting. if your render took 5 minutes, it would take possible 8-10 minutes to render with a full 4096 texture resolution. is it worth losing 3/4 of the detail to save 3-5 minutes on a render? -
min shading rate
again, a min shading rate of 2.00 pretty much halves the detail in your render again. so we are down to what, 1/8th detail? if you are only concerned with speed and not with detail then why not render in the poser 4 engine? the above scene could have been rendered in less than a minute with the P4 renderer and actually still have 100% of the detail and more accurate shadows.
I am very happy and always pleased with finding info about using P6. However, I've only had the program installed for about 2 months and I get confused by many things so I have to ask some questions.
Quote - LIGHTS... I've been quickening the effect (impatient and ailing pc) by using an infinite light (RayTrace shadow set to .30 to .50) with blur (avg 2- 10. Bias is .80 to 1.0)...as the main light.
Okay I understand about the infinite light but how do you adjust the RayTrace shadow? Where is this setting located? I don't understand this "set to .30 to .50". I understand the blur and the bias but not this Raytrace shadow setting.
Quote - I suppliment this with a specular only infinite light(RayT) with shadows on (20-45 intensity). Keep the spec light on top of your mainlight or close to it.
What is a specular only infinite light?
Quote - Light intensity set from 45 inside to 90 outside. Shadows off! Specular black.
I understand intensity but what is the "45 inside to 90 outside" stuff?
Quote - Now if you are really lazy,,,turn AO ON the IBL and reset AO scene options to 1.0 max distance, 0.04(inches) bias or thereabout. Rendetimes are about 1/8th of the time of an equivilent shadowmap spot system. There are artifacts from the AO/IBL light but, not bad.
Understood the 1.0 max distance setting but do you mean 0.04 on the bias setting if your poser units are in inches?
Sorry to be so dense but I had to ask or I'd just get frustrated.
Thanks,
Micheál
"Raytrace Shadows" is in the light properties box. You can click it on or off.
I think Richardson means a Raytrace Blur 'between' 0.3 to 0.5 and Bias 'between' 0.8 and 1.0..this is also found in the propteries box for lights
Richardson is saying, in the material room, set the specular properties of the light to the color black.
45 to 90 means... set the light intensity (found in properties as well) to 45% strength for interior scenes and 90% strength for exterior/outside scenes (like sunlight outside)...you'll find intensity on the light parameters box.
Not totally sure about the last distance part
To Blackhearted or other pros: I've heard you can set texture sizes to match your render size and won't lose quality. So if rendering at 1024 the textures can be set at 1024 and no quality will be lost...do you all agree/disagree with this?
Fin
Finister, my reading on texture size is even more Draconian. According to these sources, the texture size doesn't even need to be the size of the render. It only needs to be about the size of the pixel area in which it will render. Basically, if you have a 4096x4096 texture on V3 and she is at a distance from the camera so as to only occupy 512x512 pixels (approx.), then you can safely use a 512x512 texture size instead. Anything above this is lost in the pixel size. Some might argue that the subpixel calculations will lose detail, but the end result is still an averaged pixel as the final render and just adds complexity (and time) to the render process.
Robert
C makes it easy to shoot yourself in the
foot. C++ makes it harder, but when you do, you blow your whole leg
off.
-- Bjarne
Stroustrup
Contact Me | Kuroyume's DevelopmentZone


A definite bkmrk on my book. An aboslute must...
Thanks for sharing,
JB
____________________________________________________________________________________________________________________________
Asus N50-600 - Intel Core i5-8400 CPU @ 2.80GHz · Windows 10 Home/11 upgrade 64-bit · 16GB DDR4 RAM · 1TB SSD and 1TB HDD; Graphics: NVIDIA Geforce GTX 1060 - 6GB GDDR5 VRAM; Software: Poser Pro 11x
To add to what I said in my last post, it should also be stated that, of course, this scenario changes completely with animation. Then you must take your closest shot as determinant for texture size. Would it were that most 3D applications had a texture LOD so that you could use a set of different resolution texture maps which are interchanged dependent upon distance or some such calculations.
Robert
C makes it easy to shoot yourself in the
foot. C++ makes it harder, but when you do, you blow your whole leg
off.
-- Bjarne
Stroustrup
Contact Me | Kuroyume's DevelopmentZone
@Nvlonewulf: AOMaster = Occlusion Master by Face_off. Here's the link to the PC-version (there's a Mac-version avaiable, too):
http://www.renderosity.com/mod/bcs/index.php?ViewProduct=38822
I'm not always right, but my mistakes are more interesting!
And I am not strange, I am Limited Edition!
Are you ready for Antonia? Get her textures here:
The Home Of The Living Dolls
adjusting the texture size in poser is not a good idea. poser's dynamic resizing does a much messier job than simply doing it by hand, and it still uses more resources since it is still loading the full size texture map into memory and then just interpolating the detail in the render.
if you really want to save on poser resource usage, then resize the texture in photoshop by hand.
for example (ill use my GND character as an example):
youd open body_nat.jpg (the body tex) from ..PoserXRuntimetexturesBlackheartedGND2alpha
the default size of this is 3072x4096
you could adjust the texture size in photoshop to 768x1024 or 1536x2048 and save it as body_natLO.jpg or whatever. in photoshop i would save at around 70% quality compression.
now you can either change the texture from body_nat.jpg to body_natLO.jpg in the material editor by hand, or if you like you can edit the MAT file yourself. to do this simply:
open up windows Notepad
(if you cant find it go to Start > Run > type in notepad.exe and hit enter)
open up the MAT file you want to edit, in this case ..PoserXRuntimelibrariesposeBlackhearted GND2!skin_alpha MAT.pz2
in notepad go to Edit > Replace (or hit CTRL+H)
in the firts field type in body_nat.jpg
in the second field type in body_natLO.jpg (or whatever you named your resized tex)
click 'Replace All'.
save this MAT under a different name, such as !skin_alpha LO.pz2
repeat this for the head tex, etc. you can do this for any texture you like and the results are superior to poser texture resizing. this is especially noticeable around the face.
yes it takes a bit of time, but i would do it if i were creating an animation. by reducing the resolution of the textures of the figure, clothing, hair, etc i would save dozens of hours over the course of a several thousand frame movie. or perhaps if you have a slow computer and regularly render multiple characters, you could do this to the textures of the background characters if they were different from the main one.
for a still render for my gallery? i would not reduce any resolution. the 5-10 min i save on a render due to reducing the textures (either by hand or in photoshop) is not worth it to me.
but consider this folks -- for preview renders compromising on detail is natural, you bump up the min shading rate to around 3.00 or 4.00, turn down tex res to 500 or so, turn pixel samples to 1, and render a quick small preview to see how the lights and shadows turn out.
but to render a final production render like this? think about the hours it takes to set up a good render, lighting, shadow, pose, etc... then the hours it takes to postwork it or composite it. it even takes time to create thumbs, post it, etc. so the average person is working at least around 3-5 hours on a nice render. why base this all on a 5-minute render that discards 7/8ths of the detail???
my detail examples above (they were not trying for realism, just a quick slapped together render showing the difference in detail between the settings), took 5 min to render the low detail one and 55 to render the high. but this is at EIGHTEEN TIMES antialiasing. if i had a more modest AA setting such as 4-5 it would have rendered in around 15-20 minutes easily.
if you are just slapping renders in your gallery to fill it up and submit something for the sake of submission, sure reduce all the details. if you are animating, you are better served picking up reduced res figures and clothing and manually reducing the textures to 512 or 1024 textures high.
but if you are going to sit there for several hours setting up and then postworking a render, then dont base it on a 5 minute one. go have a coffee, or take the dog out for a walk, and let it render the full detail.
there are many solid suggestions in the first post for rendering such as using the heirarchy editor to get rid of parts of the body under clothing, etc (do not use backface culling however as it will mess up your shadows). but the problem as i see it with the average poser render is that most people do not even change the default poser render or lighting settings for their gallery renders, and they could be much improved by tweaking them for the better, not the worse.
Attached Link: http://excalibur.renderosity.com/mod/gallery/index.php?image_id=1076724&member
Thanks guys! It's been quite a while since I started this thread. I was surprised to see new posts in it. Looks like most of the questions were answered. Thanks BH for dropping good info here. It is apples and oranges, though. These settings (original post) were never meant for a closeup. Your render times prove my original point, btw. My render attached;This render make your point. Maxed out textures, render settings and light settings. Render time 8-9hrs. Looks better. No doubt about it. These are "final" settings.
I'll try to tidy up those light setting numbers for you Sealtm2...I'm still cannot access my P6.
When I wrote this thread, it was during a long fight with an ailing pc that would not allow me to render with the settings I wanted. If I wanted to post a decent render, I literally had to "find" the way to make it happen. My new pc will allow me the luxury of not having to deal with a lot of this. I think, though, that it is still useful in getting a maxed out scene to render and/ or if you have an old pc.
I refer to the 2nd post by kuroyume0161 and his "draconian" take on how big a texture resolution has to be when occupying a 512x512 space. This sums up (in a lot less words lol) my take on the use of texture reductions.
It started for me when V3 was released and some were trying to see how many could be rendered in one scene. Something became apparent early on. As you added more figures to your scene, your camera had to back off to see them. As your camera backed off, the resourses required decreased and so, hi res requirements decreased as well. Low res skins could then be used (no difference from that distance) and a few more V3s added...
It takes more power to render a closeup of a head with hi res texture and hair than it does to render 3 hi res figures at a few paces. Why? More of that hires texture fills the screen with the closeup. The shading rate has to be lowered to deal with the hair artifacting and detail.
With a closeup, you have to use max settings for realism. The max texture has to be 4096. The shading rate has to be low. Btw, Each point drop on the shading rate (1.00-0.00) requires firefly to make 100micropixel calculations for each pixel. So, if you ever wonder why things don't seem to be moving, check your shading rate first. Pixel samples have to increase with distance (figure to camera), oddly enough to escape artifacting (jagged edges). Closer you are, less you need.
Sorry Fox! You wanna closeup render? Prepare to suffer.... LOL
Hope this is still useful and gets you a render.
Attached Link: http://www.renderosity.com/mod/gallery/index.php?image_id=465795&member
Missed that Vince...linkHere ya go... Insanity!
- 1
- 2
Privacy Notice
This site uses cookies to deliver the best experience. Our own cookies make user accounts and other features possible. Third-party cookies are used to display relevant ads and to analyze how Renderosity is used. By using our site, you acknowledge that you have read and understood our Terms of Service, including our Cookie Policy and our Privacy Policy.
Content Advisory! This message contains nudity
The following is not necessarily the opinion of fellow renderers, merchants or other cgi gurus. But if you hate to wait... LIGHTS... I've been quickening the effect (impatient and ailing pc) by using an infinite light (RayTrace shadow set to .30 to .50) with blur (avg 2- 10. Bias is .80 to 1.0)...as the main light. I suppliment this with a specular only infinite light(RayT) with shadows on (20-45 intensity). Keep the spec light on top of your mainlight or close to it. The main fill light is an IBL(anywhere) tinted to fit your scene. Light intensity set from 45 inside to 90 outside. Shadows off! Specular black. Now if you are really lazy,,,turn AO ON the IBL and reset AO scene options to 1.0 max distance, 0.04(inches) bias or thereabout. Rendetimes are about 1/8th of the time of an equivilent shadowmap spot system. There are artifacts from the AO/IBL light but, not bad. SHADERS... All this has to be used with Real Skin Shader(fastest) or one of the others(better quality)...A must. Period. No (fake...lol)sss or correct specular on skin, no realism. Yes,,, you can put a high res skin on and not use shaders but it will fail when you move it or animate. These skin shaders also can add freckles or skin mottling to augment, say,, a low res skin...faster still in a render. AO... Now,,,if you really want a nice render, Use AOmaster after running the skin shader. Set it ON for all surfaces UNDER another...(hand on hip, AO OFF on hand and fingernails, ON on hip, torso, etc). AOmaster adds a specular node to the mix...a nice benefit. Easy to use. Don't put AO on hair...put it on the head, neck, torso and turn hair shadows off (parameter box), Visible in RayT OFF instead. Big time saver. HAIR... BIG time killer. Be honest,,, if you have a full figure visible in a 1024x768 window, do you need a 2000x1000 hair texture stuffed into that 100x200 area? Or, do you really want to drop the shading rate to get rid of the artifacting(firefly flippin out on the big texture)? Go to your paint prog and resize these textures and transmaps to 50% and save them as such(Koz red 1half.jpg,,Short TR 1half.jpg) Load them in the matroom and back in poseroom save them to hair library with a new name...You'll love it. Thanks stewer! SKIN... Hard to improve on the Skin Shaders but, the settings can be played with. Bump to 0.03, and/or displacement to 0.035(and in matroom change granite scale to 12 from 5) om bodyparts(opens up the creasing and can be made to even resemble cellulite)... Add tint to the torso color (taupe purple/blue on top Right of color zone), then save it to matroom library and click it onto each bodypart...If you are really adventurous, you can open up the shader and change the colorramp there. Keep specular low. Instead add an anistropic node to Specular color (white) and set value to 0.20. Play with highlight size,,,Set anistropic node to an aysmmetrical value(0.01x0.5, ex)...same for fingernails. Impatient,,,right? You can turn off bump and just use displacement if far enough away... Skins can be resized also... EYES... Don't use reflection/refraction nodes unless the face fills the screen. Don't use specular color either (make it black). Cornea and eyewhite are you're only reflective surfaces so, add an anistropic node to them. Scale the node to taste. Bump the eyewhite from texture.(pull a wire from texture to bump and set it to say, 0.008). This breaks up the anistropic at a low cost. For cornea, same with anistropic but add a transmap reflect texture instead. Make sure it's on the side of the mainlight! If not, mirror them in paint and reload them in matroom. Iris and pupil need only the texture. If using AO, attach to eyewhite( 0.5 to 1.0) Closeups are another matter... CLOTHING... What's that? Check the texture sizes. Make invisible all body parts hidden under cloth. Hell,,, make invisible ANY part not visible in your scene... In hierachy editor, a quick off/on on universe restores everything. Just in case,,,HIP controls body. ALT/left mouse on HIP makes all body invisible. Left click, head, eyes, neck, prop hair to make visible etc for full clothing. Gloves,,, ALT/left click forearm and all below shoulder is invisible. Repeat to make visible. ALT/left click Buttock and all below are gone....(unless bloody GOAL got in the way) RENDERSETTINGS... Less than you may think. I rarely render over 1024 max texture res. I never go higher than 2048. Shading rate at 2.00. No filters. No smoothing unless it's close... RayTrace bounces at 0.00-1.00 unless there are mirrors or a closeup. Pixal samples at 3 RayTrace ON Shadows ON Use displacement maps ON Hope this aleves some pain