Renderosity Forums / DAZ|Studio
Welcome to the DAZ|Studio Forum
Forum Moderators: wheatpenny Forum Coordinators: Guardian_Angel_671, Daddyo3d
DAZ|Studio F.A.Q (Last Updated: 2025 Jan 28 7:46 pm)


Subject: Reality Render thread. A new beginning.

Quote - So, it prodded me to redo a render of mine that I wasn't quite happy with. I've rendered it several times before this. I made a slight change in how much the eyes were open. Called Reality. Hit the render button and about jumped outta my seat! Totally creeped me out. His eyes are white. No pupil, no iris, no anything, just zombie white! What would cause this?
See if this is the cause : http://youtu.be/v-HbELVoqq4
Cheers
Paolo
https://www.preta3d.com
FB: https://www.facebook.com/RealityPlugIn
Tw: @preta3d
G+:
https://plus.google.com/106625816153304163119
The
Reality Gallery: https://reality-plug-in.deviantart.com

Attached Link: Mini pedicurist 2


Mac users, please note that shader map is Windows-only.
Paolo
https://www.preta3d.com
FB: https://www.facebook.com/RealityPlugIn
Tw: @preta3d
G+:
https://plus.google.com/106625816153304163119
The
Reality Gallery: https://reality-plug-in.deviantart.com

Quote - Nice render on D/A Turbo makes me think eyez gots to start playing with normal maps at some point. In the meantime....
Not sure which one you were referencing, but I'll gladly take a compliment!
Normal maps aren't really magical that will make a flat image suddenly brilliant. Their purpose is more like a 3D bump map, which defines the shaders of a texture map to look like it has better depth (at least that's my interpretation). I agree, they're great at what they do, but a great image is a total package: textures, lighting, shadows, materials, composition. You get where this is going... 
crimsonworx.com; free ebooks and previews
I've bowed down to facebook: https://www.facebook.com/crimsonworx
Off topic warning (unless there's a model I don't know about), but for you car porn-aholics, the lust begins at :50 seconds. Towel please!
http://www.youtube.com/watch?v=W3Gyiu7PjIY&feature=related
Back to your regualr programing.
crimsonworx.com; free ebooks and previews
I've bowed down to facebook: https://www.facebook.com/crimsonworx
Quote - does that program or any do it with just a one click conversion?
Yes, I have "Shader Map 1" and it has one click conversion. ShaderMap converts existing maps to different formats. It also generates new maps from scratch.
But why don't you try the demo, Bob. It cost you nothing but a little time ...
Thank you for the Zombie Eye Fix. It was the specular setting, plus the texture itself seemed to only half load, so I redid that and he once again has eyes ;) Thanks again!
I still haven't gotten the glass wares to work, changing the gain gave me part of a texture with weird blackness. I did lighten the texture but only part of it responded. I'm trying to figure out how to lighten the whole texture. There must be a way, it's probably operator error.
Quote - Thank you for the Zombie Eye Fix. It was the specular setting, plus the texture itself seemed to only half load, so I redid that and he once again has eyes ;) Thanks again!
I still haven't gotten the glass wares to work, changing the gain gave me part of a texture with weird blackness. I did lighten the texture but only part of it responded. I'm trying to figure out how to lighten the whole texture. There must be a way, it's probably operator error.
For your glass texture, I really wish I had that set, but alas I do not. I'll pick it up one of these days. Before you alter it, can you do a quick render and post what you have with Lux? Even if the preview box displays that black circle, you'll still get a glass object of some sort when you hit render frame.
If you're determined its the texture and you've got Gimp or your choice of photo software, lightening is pretty easy. With Gimp (or whatever you use, I suspect it's very similar, but Gimp is free and available!) there's a few ways to get what you want. My first suggestion would be to open your image and head to the color tab. I'll use Gimp since I know that best. In the color tab about 3/4 of the way down the tile, there's a feature called Channel Mixer. In that, you can adjust the RGB values. It may require you to slide each color back a bit. This is more touchy feely than the second method I'll touch on, but it won't affect the quality of the color as much.
The second, or just another way really, is going straight to the brightness/contrast function (also in the color tab in gimp, like second or third from the top). Contrast and Brightness are both are on sliders with numerical whole values, positive or negative from zero. If you wedge contrast down a few points, it will lighten it just a fraction at a time, and you can adjust with the brightness in the positive direction so you don't lose too much color. Brightness and Contrast tend to introduce shades of gray in my experience, so I tend to try the Channel Mixer first.
If all else fails, you can email your texture to me 
crimsonworx.com; free ebooks and previews
I've bowed down to facebook: https://www.facebook.com/crimsonworx
OT thanks Sharkey for the clothing tranfer tut this is usefull for boots since by retaining their morphs it gives one a bit more adjustment controls and the best part. One can avoid the mess that is studio 4.5....
I still not have tried the genx one which is not really somrthing I find i need since i have no problems using Gen 4. The main reason I use genesis is for my face gen characters..


Figured it was time to post SOMETHING.. so tadaaaaa.. my wife's first ever render.. and I mean FIRST FIRST.. she just installed daz studio yesterday afternoon.
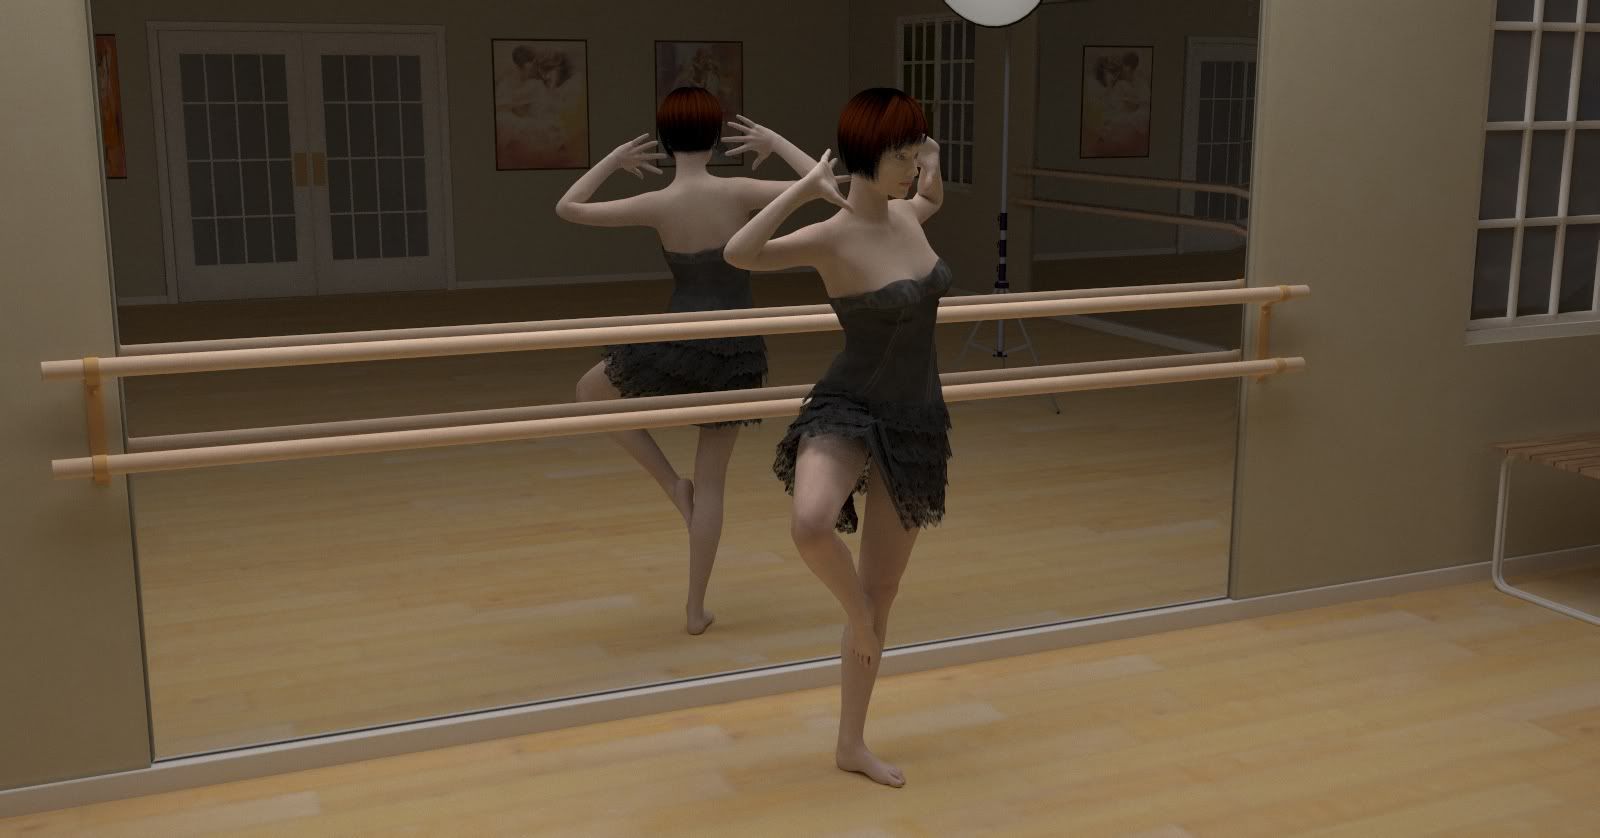
Larger image on click.. I gave her a nudge or two with Reality and Lux and am still constantly tutoring.. but she's coming along nicely for having a 3D graphics education that is less than 24 hours old.
Attached Link: Mini pedicurist 3

Your getting it here is another
Your getting it here is another
Bob.. that's my wife's render.. I'm gonna make her get a renderosity account so she can do her own stinkin posting. She just installed D|S yesterday and this is her first everything. I was gonna start her out rendering in 3Delight until she got the hang of things.. but why teach a person how to drive a volkswagen when you have a Ferrari in the garage?
Quote -
Your getting it here is another
Bob.. that's my wife's render.. I'm gonna make her get a renderosity account so she can do her own stinkin posting. She just installed D|S yesterday and this is her first everything. I was gonna start her out rendering in 3Delight until she got the hang of things.. but why teach a person how to drive a volkswagen when you have a Ferrari in the garage?
Oops missed that part my wife has no interest in this as a hobby...

Quote - Mine does... I picked one with a lot of the same interests as me..
Of my many interests, I tried to get my GF into rendering, but she didn't care for it, but boy did she get into modeling after watching me work on a SIMS3 model, she is hooked now. Need to get a modeling app for her since I can't get into 3DSMax anymore when she is over, LOL.
Tell your wife, nice work!
Regards, Michael
Quote - but why teach a person how to drive a volkswagen when you have a Ferrari in the garage?
If/when I get my dream Ferrari, that's going on the bumper! Maybe a magnetic version :-)
By the way, is that one of John's studio lights? I've been meaning to try those, but have been hung up on doing a skin texture all day and doing Reality presets.
crimsonworx.com; free ebooks and previews
I've bowed down to facebook: https://www.facebook.com/crimsonworx
Quote - By the way, is that one of John's studio lights? I've been meaning to try those, but have been hung up on doing a skin texture all day and doing Reality presets.
Yes it is.. it's a pack of like 9 lights.. we worked for a couple hours getting the square reality mesh light to give a good mirror reflection and still be out of the shot.. we couldn't do it.. so I downloaded the lights and we decided that it actually looked good in the shot so left it in.. I've no clue how to do mirrors in reality without the lights showing up in the shot now matter how it's cropped.
Maybe Paolo can give a tip or two... ~hint hint~ ~nudge nudge~
Quote - Maybe Paolo can give a tip or two... ~hint hint~ ~nudge nudge~
Yeah! Tut, Tut, Tut! (that's my war chant)
I've been on a quest recently for just that reason (avoiding the reflection of the mesh light that is). It's tough! Eyeballs, windows, wet streets. It shows every time.
I tried adding a diffuser set to matte transparent, like the soft box, but it clouded my character's eyes. 
I ended up just shrinking it to around 100% or 90, don't remember which, and hiked it way, way out of the scene with a sharp downward angle, then scaled it wide on the x-plane and narrow on the z-plane. That was my crazy fix for this one:http://fav.me/d549i73
I've got one more of a new character's headshot that plagued me with the mesh-in-the-eye reflection, so I ended up getting even more extreme. There's one little dot right now in the left eye, and I think it's acceptable. No worse than you see on TV.
crimsonworx.com; free ebooks and previews
I've bowed down to facebook: https://www.facebook.com/crimsonworx
"Bob.. that's my wife's render.." She's doing really well! Now, be a sweetie and let her go shopping and buy something pretty for her favorite model. Shopping is part of the fun! She's braver than I am.. I'm still to uncertain about what I do to post. I've been thinking about doing a ballerina too. She has excellent taste ;) I'm anxious to see more of her renders.
Here is a render of a Wonderous Wares vase. I set the gain at 2. I also found out I had to use an HDRI in the place of the skydome that the vases came with. I used an IBL that came with Reality.
Two things: What if I didn't want a picture of a swimming pool or anything else like that in my scene?
The vase is still black.
Good thing it's not real or I might break it. Not really, but I am frustrated. Mostly at my ignorance. Any suggestions? 
Quote - Here is a render of a Wonderous Wares vase. I set the gain at 2. I also found out I had to use an HDRI in the place of the skydome that the vases came with. I used an IBL that came with Reality.
Two things: What if I didn't want a picture of a swimming pool or anything else like that in my scene?
The vase is still black.
Good thing it's not real or I might break it. Not really, but I am frustrated. Mostly at my ignorance. Any suggestions?
That is definitely a black vase. With IBL's, you don't need to have an HDR image in the slot to use it. Just check the box and have either the rectangular or spherical map shape selected.
What I find works well is 1 mesh light + the IBL channel running. Good images and fast results. Sometimes I use an HDR with the IBL, sometimes not. Depends if I want reflections of the IBL image on shiny surfaces or not.
Anyway, back to your vase conundrum. For your glass settings, you have 255 (or thereabouts) in both the transmission and reflection colors, right? And if you have a mesh light in the scene, make sure it's not silohouetting your vase. Sorry if this sounds stupid and obvious, but I'm running the gamut for the 'just in case' incident.
There's definitely not an alpha map, otherwise you'd have the opposite problem (no visible vase) unless the alpha map is completely white. You can check that in Reality, too, in the middle tab named Alpha Channel by clicking on the gear on the far right and selecting 'view texture+UV'. Again, I can't imagine why there would be an alpha map needed for this particular prop, but best to check anyway.
And in the far right tab called Modifiers, check to see if there's one hiding in the bump or displacement channel. I wouldn't think there would be one, but best to look anyway.
By the way, Paolo mentioned that this vendor was a Reality user. I may have forgotten, but there isn't a preset in ACSEL, right?
Outside of the chance that the geometry of the prop is flawed, have you tried making something else from your runtime glass? Even a primitive cube scaled into a thick rectangle will work for demonstrative purposes. Make sure 'Architectural' or 'hyper realistic' is checked, and see what the thin film and IOR are set at. These values add a look, but too high or low won't hurt much if you're experimenting.
crimsonworx.com; free ebooks and previews
I've bowed down to facebook: https://www.facebook.com/crimsonworx
I've been working on a lot of concept characters for my new book idea, but I think this guy has been my favorite. I'm sorry to point y'all to DA for the best view, but it's necessary to see his best feature. If you head that way, click for full view and stare into his eyes. (not too long, he might bite!) http://fav.me/d54ioea

crimsonworx.com; free ebooks and previews
I've bowed down to facebook: https://www.facebook.com/crimsonworx
Quote - Here is a render of a Wonderous Wares vase. I set the gain at 2. I also found out I had to use an HDRI in the place of the skydome that the vases came with. I used an IBL that came with Reality.
Two things: What if I didn't want a picture of a swimming pool or anything else like that in my scene?
The vase is still black.
Good thing it's not real or I might break it. Not really, but I am frustrated. Mostly at my ignorance. Any suggestions?
You shouldn't be having so much problem with glass, it's so easy in Reality.
Why don't you start by importing the obj of that bottle instead of loading it as a prop. This way we have no texture or anything else loading with it, so we will see if its the geometry or the supplied textures that are not right.
Make a plane for the floor, make another plane rotated 90 degree as a back wall. Position your bottle in front of that wall but not touching it. Put one of Reality's mesh lights in the scene, not too close to the bottle a little higher than the model and rotated towards it, imagine you are in photo studio.
Don't assign any textures in Studio. Call up Reality.
Assign a white matte material for the two planes. Select the vase and assign the glass material, white diffusion, white transmission, select an index of refraction for glass from the drop-down menu, select hyper-realistic. This will give us a regular plain glass look.
In the camera settings, ISO 125, Shutter speed 1/4 f/stop 5.6
Lights, leave the mesh light as is, plug in an IBL light, I personally prefer the spherical ones this will give us the nice reflections in the glass.
Hit render, and let's see what you get.
Dominique Digital Cats Media

Quote - I've been working on a lot of concept characters for my new book idea, but I think this guy has been my favorite. I'm sorry to point y'all to DA for the best view, but it's necessary to see his best feature. If you head that way, click for full view and stare into his eyes. (not too long, he might bite!) http://fav.me/d54ioea
Really good stuff SBT. Even with a full lux render, I can't seem to get that realism to skin textures. What is your bump set at with that skin? Mine usually starts at 200% and I turn it down to 100% or less. Am I doing that wrong?


Using normal maps to tile Hellboy's posing background. Just the two lightsources (Reality Softboxes). Been in lurk mode but have posted lots more posted to my gallery.


Quote - I've just finished the 3rd spotlight (2 more to go) and thought I'd let you see how it looks. I've sent it to Braintickler to tested it for us, once he has given me the go ahead I will add it to the set.
Looks great again. Just downloaded and installt it. I'm going to build a demo scene right now ...

Quote - > Quote - I've just finished the 3rd spotlight (2 more to go) and thought I'd let you see how it looks. I've sent it to Braintickler to tested it for us, once he has given me the go ahead I will add it to the set.
Looks great again. Just downloaded and installt it. I'm going to build a demo scene right now ...
You are supposed to give the go ahead, not keep it to yourself :cursing: :biggrin:
Quote - > Quote - I've been working on a lot of concept characters for my new book idea, but I think this guy has been my favorite. I'm sorry to point y'all to DA for the best view, but it's necessary to see his best feature. If you head that way, click for full view and stare into his eyes. (not too long, he might bite!) http://fav.me/d54ioea
Really good stuff SBT. Even with a full lux render, I can't seem to get that realism to skin textures. What is your bump set at with that skin? Mine usually starts at 200% and I turn it down to 100% or less. Am I doing that wrong?
Thanks Sharky. This particular guy was a freebie at Rendo and came as just the texture. I made a bump, displacement and a normal map for him, and in this instance, used the normal map as an experiment. Sometimes I prefer a bump map in the looks department, but on this guy I couldn't tell the difference. With the bump I start at 100 and usually top out around 120%, but then again I set the bump depth to begin with so I know how 'deep' the map will look. The pack-in bump maps almost have to be viewed separately before you drop it in the channel to see the creator's thoughts on depth.
Other than that, it's all skin settings with gloss and top coat :-)
crimsonworx.com; free ebooks and previews
I've bowed down to facebook: https://www.facebook.com/crimsonworx

"Why don't you start by importing the obj of that bottle instead of loading it as a prop. This way we have no texture or anything else loading with it, so we will see if its the geometry or the supplied textures that are not right."
How do I import one of the vases as an object? Is the file an .obj file or something else?
"Lights, leave the mesh light as is, plug in an IBL light, I personally prefer the spherical ones this will give us the nice reflections in the glass."
By IBL light do you mean one of the IBL lights in Reality that look like a pool, etc? Or is it the little IBL sphere that is under props? I tried one of the ibl lights and it rendered a pool, so I'm figuring that's not it. I don't know what plug in an ibl light means either. I'm very new to Daz and Reality... but I guess that shows. Thank you for helping!

Content Advisory! This message contains nudity
Attached Link: DA link.....
Experimenting with camera focal lengths and angles.....
Attached Link: Hand held


Xandi, in the Content tab, right click on the prop icon and select "Browse to file location", this will tell you what folder the file is saved in. Then go to File Import and search Daz 3D, Studio3, content, Runtime, Geometries, (folder you noted earlier). And just select the OBJ file.
Not really sure how Daz 4 works but I think it is -
Daz 3D, Studio, My library, Runtime, Geometries, (and the folder you searched for) and select the OBJ file.
Hope I got that right - John

Quote - Devotion
Interesting image. Doesn't look very comfortable though.. One might think you have been reading 50 Shades of Grey..
Privacy Notice
This site uses cookies to deliver the best experience. Our own cookies make user accounts and other features possible. Third-party cookies are used to display relevant ads and to analyze how Renderosity is used. By using our site, you acknowledge that you have read and understood our Terms of Service, including our Cookie Policy and our Privacy Policy.
Ah, the ol' eye haunt again. Check your specular setting. Too high like 255 across the board will white out eyes, or any texture for that matter. The cornea, tear and eye surface should be set to glass also if this is one a V4. Dump that specular setting to 50 (or way less) and use off-white values for diffuse (250, 250 250, for example).
Edit: If the texture disappeared, try reloading from studio
crimsonworx.com; free ebooks and previews
I've bowed down to facebook: https://www.facebook.com/crimsonworx