Renderosity Forums / DAZ|Studio
Welcome to the DAZ|Studio Forum
Forum Moderators: wheatpenny Forum Coordinators: Guardian_Angel_671, Daddyo3d
DAZ|Studio F.A.Q (Last Updated: 2025 Feb 10 2:36 pm)


Subject: Reality Render thread. A new beginning.


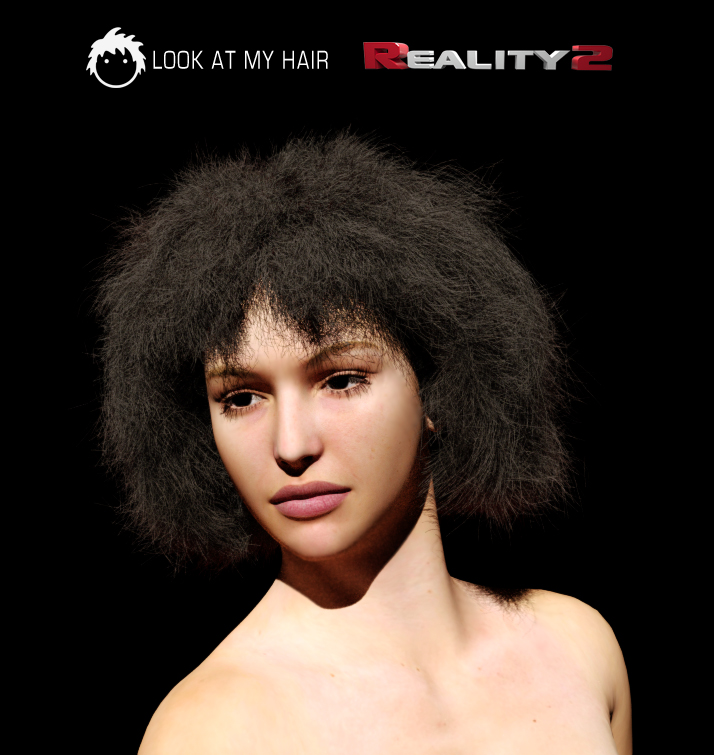
Quote - One of the best Reality artists posted something a while back it also looked odd gotta say not a big fan...
... big fan of what? OBJ hair vs. OBJ transmapped hair? Fibermesh vs. Look at my Hair?
visit my
blog: www.alessandromastronardi.com
My
Rendo Store

Did you ever try using it yourself or you've based your opinion on the very few renders done with it in Lux so far?
visit my
blog: www.alessandromastronardi.com
My
Rendo Store
No problem Bob, anybody is entitled to have his/her opinions an I respect yours.
I was just trying to understand.
visit my
blog: www.alessandromastronardi.com
My
Rendo Store

Quote - Some Lux test renders done after styling and exporting hair from the "Look at my Hair" plugin.
I'm quite new to Lux/Reality and used a plain Glossy shader, so I guess maybe there are more dedicated shaders for hair?

I like them! :) ..now any change on 'collision detection' in the near future? Uhm.. and a brush ~as in hairbrush~ to make styling easier??

Content Advisory! This message contains nudity
Attached Link: 'Mermaid' for Megan
This one is for Lasserine (Megan). She asked me: "Have you ever given any though to rendering a mermaid?"Well, I didn't... but once the question was asked I could not help but render a ...Mermaid!


Quote - Welcome AM! I've been looking at this plug-in since it came out. Callad did a render using your plug-in, which turned out very nice. You need to experiment to see what worrks best for you. I've not seen dedicated hair shaders (well, I haven't actually been looking). Your renders look good indeed, I like the long hair of the first one.
How easy/difficult is it to use?
Hi, thanks. It is quite easy to use, even if it needs some practice to get the swing of it, and there are several presets already available for most common figures that one could use as a start base.
Just in these days we are implementing the collision detection engine and two additional styling tools: especially collision detection will make it much easier to get styling done properly as points will not be allowed to poke into the model as it happens now.
visit my
blog: www.alessandromastronardi.com
My
Rendo Store
[quote
I like them! :) ..now any change on 'collision detection' in the near future? Uhm.. and a brush ~as in hairbrush~ to make styling easier??
Hi Callad, thanks. About your questions, yes absolutely: as I wrote earlier, just in these days we are completing the collision detection engine and adding/refining new styling tools. The update should be available in about a week.
Tot ziens :)
visit my
blog: www.alessandromastronardi.com
My
Rendo Store
Quote - [quote I like them! :) ..now any change on 'collision detection' in the near future? Uhm.. and a brush ~as in hairbrush~ to make styling easier??
Hi Callad, thanks. About your questions, yes absolutely: as I wrote earlier, just in these days we are completing the collision detection engine and adding/refining new styling tools. The update should be available in about a week.
Tot ziens :)
Oh wOw! Great! Dankjewel!! :)
That is stunning Charley!
Paolo
https://www.preta3d.com
FB: https://www.facebook.com/RealityPlugIn
Tw: @preta3d
G+:
https://plus.google.com/106625816153304163119
The
Reality Gallery: https://reality-plug-in.deviantart.com
Hey Alessandro! Welcome and thank you for posting the renders. I'm completely swamped with Reality 3 for Poser but I will play with LAMH asap. Those samples look really good. You might want to add a bit more shine to the hair. I found that usually it helps to keep the shine fairly high and use an elevated value for bump map too.
Looking forward to seeing more exmaples. Congratulations on a great product, Studio needed it badly.
Paolo
https://www.preta3d.com
FB: https://www.facebook.com/RealityPlugIn
Tw: @preta3d
G+:
https://plus.google.com/106625816153304163119
The
Reality Gallery: https://reality-plug-in.deviantart.com
Content Advisory! This message contains nudity
Attached Link: Close up

The best source, up to date, of news about Reality is the News section of our website:
http://preta3d.com/blog/2013/01/03/luxrender-1-2-imminent-release/
Cheers.
Paolo
https://www.preta3d.com
FB: https://www.facebook.com/RealityPlugIn
Tw: @preta3d
G+:
https://plus.google.com/106625816153304163119
The
Reality Gallery: https://reality-plug-in.deviantart.com
Quote - The best source, up to date, of news about Reality is the News section of our website:
http://preta3d.com/blog/2013/01/03/luxrender-1-2-imminent-release/
Cheers.
You are going to update it good enough & thank you I am sure you will let us know "here" when its ready I will be patient and many thanks for addressing it!
Content Advisory! This message contains nudity
Attached Link: 'Justine' on DA
This only was a test but I liked how Justine turned out, so here she is..Used one huge curved meshlight which I 'bended' with two deformers so it would light up the entire scene.
Very simple scene though.. Two planes (pure white) for floor and backwall and there is Justine awf cuz. Altered her materials a tad.
Used a Top Coat of 255 243 178 (soft yellow) for all of her skin and changed her pupil settings to Glossy, Diffuse color 0, Specular color 101 101 101 and a glossiness strenght of 9215 to get additional reflections.
One of my directives was to get a more natural skin tone, overall realism and also I wanted to make the render fast. Well fast it was.. 35 minutes in all. Barely did any postwork on this one.
Will be using the 'white room' pricipal some more in the next few days. Lets see what comes out of that. :)

Quote - This only was a test but I liked how Justine turned out, so here she is..
Used one huge curved meshlight which I 'bended' with two deformers so it would light up the entire scene.
Very simple scene though.. Two planes (pure white) for floor and backwall and there is Justine awf cuz. Altered her materials a tad.
Used a Top Coat of 255 243 178 (soft yellow) for all of her skin and changed her pupil settings to Glossy, Diffuse color 0, Specular color 101 101 101 and a glossiness strenght of 9215 to get additional reflections.
One of my directives was to get a more natural skin tone, overall realism and also I wanted to make the render fast. Well fast it was.. 35 minutes in all. Barely did any postwork on this one.
Will be using the 'white room' pricipal some more in the next few days. Lets see what comes out of that. :)
There she goes again with her self-portrait renders. I really must get on a ferry to the Netherlands. Very, very nice as usual my friend!

Content Advisory! This message contains nudity
Quote - This only was a test but I liked how Justine turned out, so here she is..
Used one huge curved meshlight which I 'bended' with two deformers so it would light up the entire scene.
Very simple scene though.. Two planes (pure white) for floor and backwall and there is Justine awf cuz. Altered her materials a tad.
Used a Top Coat of 255 243 178 (soft yellow) for all of her skin and changed her pupil settings to Glossy, Diffuse color 0, Specular color 101 101 101 and a glossiness strenght of 9215 to get additional reflections.
One of my directives was to get a more natural skin tone, overall realism and also I wanted to make the render fast. Well fast it was.. 35 minutes in all. Barely did any postwork on this one.
Will be using the 'white room' pricipal some more in the next few days. Lets see what comes out of that. :)
[/quoteAbsolutely Stunning!!!! Any way you could ilustrate how you "bended" the curved mesh light? I love this lighting! Extremely photo realistic!
Attached Link: Clicky here for full size image
For StevieCI used two deformers. One I just parented to the curved light, selected the deformer itself and adjusted the X-scale up to 500%.
The field from the second one I shifted to the upper 'wingtips', made the field real flat (X-scale 550%, Z-scale 29%, then selected the deformer and used the X-scale to bend the 'flaps' (12%).
Really dunno if this is enough info so you can do it yourself, is it?
Click link to see the full image of the viewport. Dressed up Justine so I did not have to tick 'nudity'. Colored the curved light so you could see it better, also the floor (blue) and made the backwall transparent so you could see how things are set up.
Does this help?


Quote - For StevieC
I used two deformers. One I just parented to the curved light, selected the deformer itself and adjusted the X-scale up to 500%.
The field from the second one I shifted to the upper 'wingtips', made the field real flat (X-scale 550%, Z-scale 29%, then selected the deformer and used the X-scale to bend the 'flaps' (12%).
Really dunno if this is enough info so you can do it yourself, is it?
Click link to see the full image of the viewport. Dressed up Justine so I did not have to tick 'nudity'. Colored the curved light so you could see it better, also the floor (blue) and made the backwall transparent so you could see how things are set up.
Does this help?
Thanks for the tips callad, much appreciated. for the most part I am happy with the lighting I use in my scenes and have a pretty good understanding of what I use, but I have a desire for more variety and have been trying other lighting methods outside my comfort zone to try and improve my images.
I have tried several wrap around lighting situations like this that I modelled myself, but was never really happy with then. your other settings could be why, so going to try them also. I notice you have a distant light in the mix, thought Paolo warned against those, LOL.
BTW stunning mermaid image, you never cease to amaze!!
Regards, Michael

Isn't this workflow just as easy:
-
Create three primitive planes and place as required respecting normal orientation.
-
Export the planes to an OBJ (don't write surfaces but write normals and UV) which will basically weld them together into 1 object.
3.Re-import that OBJ you will have 1 object with 1 material which can be converted to light.

I got it wrong again, after reading Charlies tip on the curved light I made one in Hex, got it completely wrong (I made it out of a curve so it has to many faces). But I got the scene rendering so will see how it turns out.
For me personally step 3 is to set the material to RealityLight-name, then it will load in as a light source.
Well.. With much pain and effort I created some sort of 'light dome' from a primitive sphere (12 segment and 12 sides) I exported as obj into Blender (God I HATE that GUI!!!) deleting one by one the faces I did not want so I ended up with about quarter of the original sphere.
Imported the obj into Daz and renamed it to 'RealityLight - Dome', called Reality, set the direction to 'inverse' and saved it as a scene.
That worked OK. I still have a 'fast' render and the lighting is quite 'even'.
..now I have another problem..
When merging the scene into another scene my Reality-data seems lost though there is another hidden object that is called 'reality-data (2)'.
How do I solve that? (That is another phrase for: What am I doing wrong this time??) :)
You guys do know that in DS4.5 there is a tool called Polygon Group Editor? Create e.g. a cube, select the Polygon Group Editor Tool, select a cube face, right-click and select Create Surface from Selected. Name it what you want. e.g. Invisible. Set the opacity for that on the Surfaces tab to zero, and you have an invisible face. There are many useful uses for this tool, e.g. renaming a face to e.g. RealityLight_whatever. Saves converting it to light in Reality. Do be aware that this is a pretty destructive tool, no undo's.


Quote - > Quote - > Quote - Somtimes, when I click, the render in reality nothing happens. It says loading materials, but nothing happens.
Usually there is something in the scene which prevents it from being exported to Lux. Try this: on the Output tab of Reality, switch to Lux Native instead of Binary PLY under Geometry format.
Reality wont even load.
When that happens, check your task manage (ctrl+alt+del) to make sure there aren't two instance of daz studio running. If there are, save your scene, close studio, make sure both instance close in your task manager, if not manually end any daz studio processes. Then reopen studio, load your scene and reality should load just fine. This has happened to me countless times and I've narrowed it down to studio 4.5 being wonky about ending processes after an error.
Quote - Has anyone tried the amazon cloud, to render faster with?
Several months back I did some pretty extensive testing with amazon cloud. The free services render about as fast as my laptop does. Going up the paid service scale, it doesn't start becoming worthwhile until you're using the multiple gpu instance. All in all, after I figured out what it would cost me, I could build a completely new rendering box after about a month of using the multiple gpu instances. Doable if you're rendering on your company's dime; but prohibitively expensive if you're paying out of your own pockets.
Quote - This only was a test but I liked how Justine turned out, so here she is..
Used one huge curved meshlight which I 'bended' with two deformers so it would light up the entire scene.
Very simple scene though.. Two planes (pure white) for floor and backwall and there is Justine awf cuz. Altered her materials a tad.
Used a Top Coat of 255 243 178 (soft yellow) for all of her skin and changed her pupil settings to Glossy, Diffuse color 0, Specular color 101 101 101 and a glossiness strenght of 9215 to get additional reflections.
One of my directives was to get a more natural skin tone, overall realism and also I wanted to make the render fast. Well fast it was.. 35 minutes in all. Barely did any postwork on this one.
Will be using the 'white room' pricipal some more in the next few days. Lets see what comes out of that. :)
Callad.. as always.. with your renders.. less is more. I absolutely love this. The minimal composition. The pose is fantastic. Lighting is dead-on. Your skin tones are fantastic. The character herself is gorgeous(I partial to redheads since I am one and have birthed two of my own). I just wonder where she's going in her current state of undress that she needs the shoes?
Haven't posted a render for a few days. Was messing around with photoshop and blacksmith trying to make some decent textures for Hongyu's Bikini. Got frustrated because nothing was coming out nice enough that I'd even share it with my wife let alone the general public. So, whipped up a quick simple nude, gave her my favorite hair and a saucy pose. Rendered it with an alpha channel and added the background and shadow in post.

Quote - Haven't posted a render for a few days. Was messing around with photoshop and blacksmith trying to make some decent textures for Hongyu's Bikini. Got frustrated because nothing was coming out nice enough that I'd even share it with my wife let alone the general public. So, whipped up a quick simple nude, gave her my favorite hair and a saucy pose. Rendered it with an alpha channel and added the background and shadow in post.
Shes a cutie! Her sad look must be cuz someone cut off her legs.. :P
Here's one that just came out of the oven. Played around in blacksmith some more and created a texture for the strapless minidress that I was quite happy with. Two light setup. One to the front right and above 45 degrees. One sized down to being nearly invisible behind the hem of the dress. Set up the dress material as matte translucent and set the opacity at about 90%. Just added a bit of diffuse to give the shot an overall softer look.

Quote -
Shes a cutie! Her sad look must be cuz someone cut off her legs.. :P
Thanks charley. She started out as AL3D's Mariko that I converted to genesis with GenX. Re-shaped her body a good deal. I recently acquired the Young teen morphs for genesis. The Julie morph has several settings you can control individually. Face, body, full body and like 6 different breast shapes. I dialed in some of the face(which gives a nicer look that just using studio's younger face setting) which gave her an early 20's look instead of a late 20's look. She's sad because she had to spend a week sitting on my hard drive before she got a chance to meet reality and luxrender.

Quote - For StevieC
I used two deformers. One I just parented to the curved light, selected the deformer itself and adjusted the X-scale up to 500%.
The field from the second one I shifted to the upper 'wingtips', made the field real flat (X-scale 550%, Z-scale 29%, then selected the deformer and used the X-scale to bend the 'flaps' (12%).
Really dunno if this is enough info so you can do it yourself, is it?
Click link to see the full image of the viewport. Dressed up Justine so I did not have to tick 'nudity'. Colored the curved light so you could see it better, also the floor (blue) and made the backwall transparent so you could see how things are set up.
Does this help?
Hey Charley I hope you don't mind but I copied the skin settings and this post you did and put them on Paolo's site. Here is the link http://preta3d.com/forum/recipes/skin-and-lighting-by-callad-use-of-curve-light-altered/#p6337
Thank you Kim!
Paolo
https://www.preta3d.com
FB: https://www.facebook.com/RealityPlugIn
Tw: @preta3d
G+:
https://plus.google.com/106625816153304163119
The
Reality Gallery: https://reality-plug-in.deviantart.com
Also by request. This one is under water, I leave the stunning versions to Callad :) I call her Aphrodite. Please click for larger.


Quote - @JtheNinja, many thanks for taking the time and effort to explain.
Ditto to that! I've slowly realized that Lux is one of those uber-complicated tools in your toolbox that you may not have read the enitre biblical-length operators manual, but you can make it work how it's supposed to work most of the time!
Still, its really good to get the inner working view, too!
crimsonworx.com; free ebooks and previews
I've bowed down to facebook: https://www.facebook.com/crimsonworx
Privacy Notice
This site uses cookies to deliver the best experience. Our own cookies make user accounts and other features possible. Third-party cookies are used to display relevant ads and to analyze how Renderosity is used. By using our site, you acknowledge that you have read and understood our Terms of Service, including our Cookie Policy and our Privacy Policy.
I guess we will agree to disagree Anton. I was not crazy about the hair on the render Charley had posted but thats just me...